Poster Machine Visual Classroom Management Guide
Starting Fresh: My Visual Management Journey
During my student teaching, I’d seen experienced teachers with picture-perfect classrooms full of laminated charts and color-coded everything. Yet when I stepped into my own classroom, armed with enthusiasm and a teaching degree, I quickly realized that creating an effective management system was about so much more than pretty posters. Thankfully, having access to a poster machine meant I could experiment, adapt, and evolve my system as I learned what worked for my unique group of six and seven-year-olds.
My mentor teacher gave me the best advice: “Start simple, observe your students, then build from there.” She was absolutely right. Instead of overwhelming myself (and my students) with every management tool I’d learned about in college, I began with the basics and let our needs guide what came next.
 visual goal cards and")
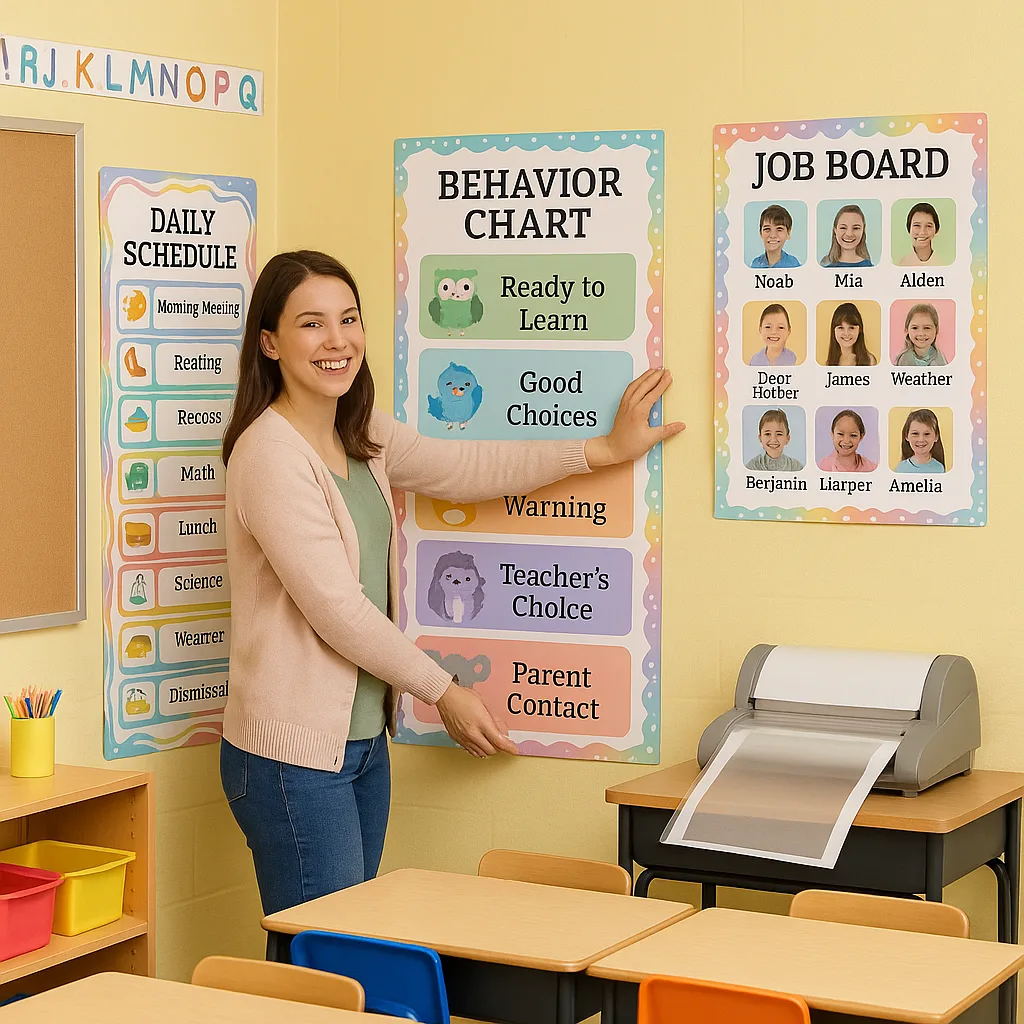
The Evolution of My Behavior Chart System
Let me share my behavior chart journey – it’s been quite the learning experience! My first attempt was a traditional clip chart with colors from red to purple. After two weeks, I noticed it was causing more anxiety than motivation, especially for my sensitive learners. That’s when I discovered the beauty of having a poster machine at school – I could completely redesign without breaking the bank.
Version 2.0 featured positive behavior focuses with fun animal themes. Each table group became a different animal team, and we tracked collective positive behaviors. This worked better, but some students still struggled with the public nature of the display. By October, I’d evolved to version 3.0: individual behavior folders with visual goal cards that students could privately track throughout the day. The public display became a celebration board where anyone could earn a spot for showing our core values.
My classroom job system has become one of my favorite management tools! Initially, I created a pocket chart with everyone’s names on popsicle sticks. Functional? Yes. Engaging? Not really. When considering the reasonable poster printer price for custom designs, I realized I could create something much more interactive and meaningful.
Now, each job has its own colorful poster featuring:
– A fun job title (Line Leader became “Hallway Hero”)
– Visual step-by-step instructions
– A photo of a student demonstrating the job
– A special badge design they can wear
The Campus Pro 24 Poster Maker has been perfect for creating these job posters at just the right size. Students absolutely love seeing themselves featured as the “expert” for each role, and it’s helped them take ownership of their responsibilities.
Morning Routine Success
My morning routine poster series has been a game-changer. Previously, I’d repeat the same instructions dozens of times each morning. Now, students independently follow our visual guide:
1. Hang up backpack (photo of cubby area)
2. Turn in homework (image of homework basket)
3. Make lunch choice (visual menu board)
4. Complete morning work (sample activity shown)
5. Read quietly (cozy reading corner photo)
The investment in a poster machine for our school has meant I can update these seasonally, adding festive borders or adjusting steps as we master new skills.
Morning Chaos
20+ minutes of repeated instructionsMorning Calm
Students now complete morning routine in under 10 minutes independently!Adapting Your System Throughout the Year
One of the biggest surprises of my first year has been how much my management needs changed as my students grew. What worked perfectly in September felt babyish by January, and our March needs were completely different from our August ones.
Having access to a poster machine meant I could evolve with my students. For example, our bathroom pass system started as simple “Stop/Go” signs. By winter break, we’d upgraded to a more sophisticated sign-out system with visual timers. Come spring, students were ready for increased independence with self-monitoring charts.
The comparison guide helped me understand why having printing flexibility matters so much for classroom management. Unlike static, store-bought systems, I can respond to my students’ developmental changes in real-time.
Here’s my seasonal adaptation schedule that’s worked wonders:
Fall (August-October): Focus on establishing routines with bright, welcoming colors. Basic systems with lots of visual support.
Winter (November-February): Add complexity as students master basics. Introduce self-monitoring tools and peer support systems. Update visuals with winter themes to maintain engagement.
Spring (March-May): Transition to more independent systems. Students help design new posters for incoming first graders. Add student choice elements to job boards and behavior tracking.
The beauty of having a poster machine classroom management system is the ability to print seasonal updates without breaking the budget. I’ve found that simply changing border colors or adding seasonal clipart re-energizes student interest in our established routines.
Student Ownership: The Secret Ingredient
The biggest breakthrough in my visual management system came when I started involving students in creating and maintaining our classroom visuals. Not only did this increase buy-in dramatically, but it also became a meaningful learning experience.
Every Friday afternoon, we have “Classroom Design Time” where students can:
– Suggest updates to our job board
– Create new routine posters with my guidance
– Design recognition certificates for classmates
– Draw illustrations for our next week’s schedule
Having a poster machine at school means we can immediately print and implement their ideas. The pride on their faces when they see their designs displayed is absolutely priceless. Plus, they’re far more likely to follow systems they helped create!