Poster Maker for Schools Visual Thinking Maps
Picture this: Instead of cramming a tiny graphic organizer onto a whiteboard, you’re unveiling a massive, colorful thinking map that spans half your classroom wall. Students gather around, markers in hand, ready to collaborate on something BIG. That’s the magic of large-format visual thinking, and it’s easier to create than you might think!
As someone who’s been in the trenches of middle school education for eight years, I’ve seen firsthand how visual tools can bridge the gap between concrete and abstract thinking. But here’s the thing—size really does matter when it comes to collaborative learning. Those standard 8.5×11 handouts? They’re great for individual work, but they just don’t cut it when you’re trying to engage 25+ students in active, whole-class instruction.
Students show improved concept understanding with visual thinking maps
Think about your most challenging units—maybe it’s analyzing cause and effect in historical events or breaking down complex literary themes. Traditional teaching methods often leave students struggling to see connections. But when you roll out a poster-sized cause-and-effect diagram that students can physically interact with? Suddenly, those abstract relationships become tangible.
The beauty of using a poster maker for schools thinking maps lies in the flexibility. Unlike pre-made educational posters that gather dust after one unit, you’re creating custom tools that evolve with your curriculum. Today’s comparison chart for character analysis becomes tomorrow’s template for comparing historical figures or scientific theories.
Creating Your First Poster Maker for Schools Thinking Maps
Ready to dive in? Let’s walk through creating three essential thinking maps that will transform your classroom dynamics. I’ll share the templates I’ve refined over years of trial and error (and trust me, there were some spectacular fails along the way!).
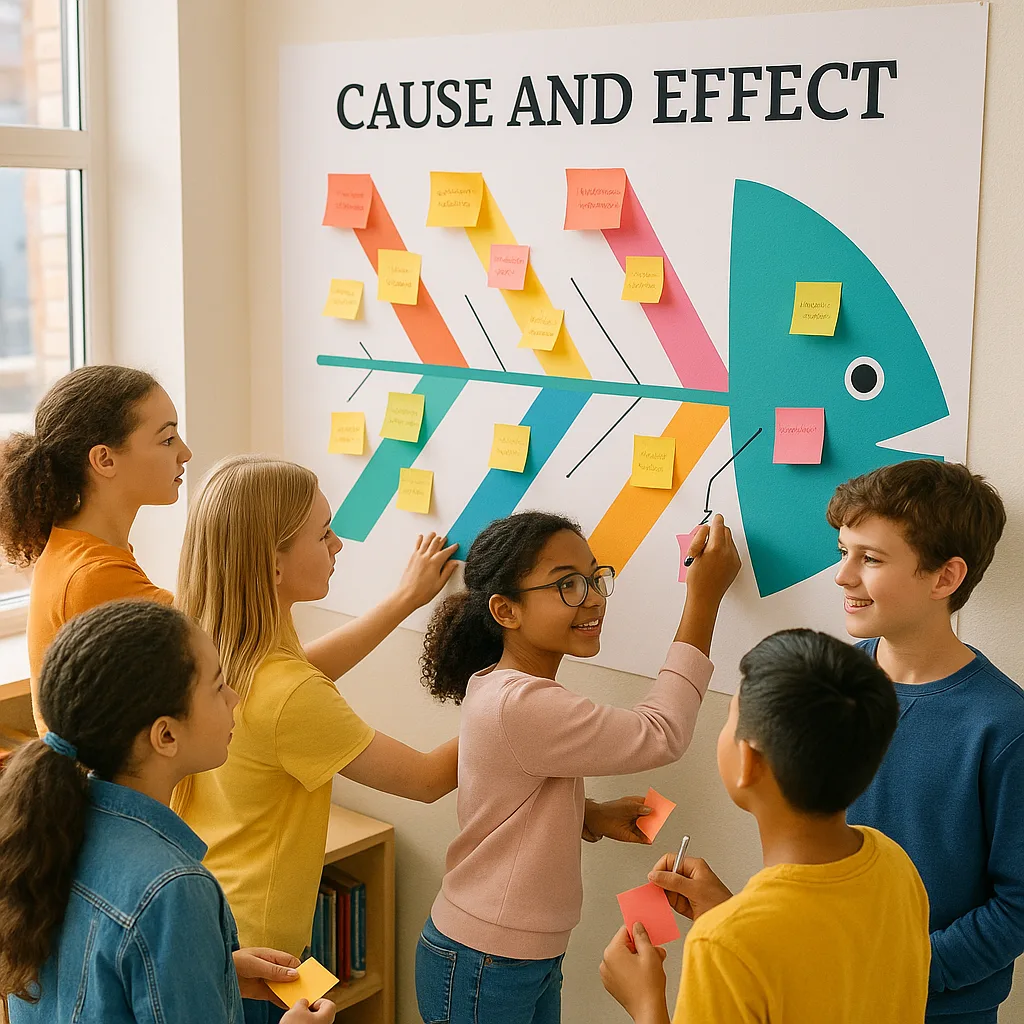
Template 1: The Mega Cause-and-Effect Fishbone
Forget those tiny fishbone diagrams crammed onto worksheets! When you scale up this classic organizer using your poster printer machine, it becomes a powerful collaborative tool. Here’s my go-to design:
Dimensions: 36″ x 48″ minimum (trust me, bigger is better)
Layout: Central “spine” running horizontally with the main effect/problem at the head
Design tip: Use bright, contrasting colors for each “bone” category
I recently used this with my 7th graders to analyze the causes of the American Revolution. Instead of individual worksheets, we created a wall-sized fishbone where different groups tackled different categories—economic, political, social causes. Students literally walked from bone to bone, adding sticky notes with evidence from their research. The physical movement alone kept engagement high!
Template 2: The Comparison Matrix That Actually Works
Y’all, Venn diagrams are so last decade! When you need students to compare multiple items across various criteria, nothing beats a well-designed comparison matrix. But here’s where size matters—those tiny boxes on traditional worksheets? They crush creative thinking faster than you can say “standardized test.”
 mounted on a classroom wall. The matrix should have 5 columns and 6 rows headers in teal (#26A69A) and")
My favorite comparison matrix design spans at least 42″ wide, allowing for:
• 4-6 items to compare (columns)
• 5-8 criteria (rows)
• Ample space for student annotations
• Color-coded sections for visual organization
Template 3: The Sequential Thinking Timeline
Whether you’re teaching narrative structure in ELA or the steps of the scientific method, sequence matters. Traditional linear timelines are fine, but have you tried a spiral timeline? Or a branching sequence map? When you have the real estate that a poster printer machine provides, you can get creative with how students visualize progression.
My current obsession is the “Choose Your Own Adventure” sequence map. Perfect for:
• Historical decision points (“What if Lincoln hadn’t been assassinated?”)
• Literary plot analysis with alternative endings
• Scientific processes with variables
• Mathematical problem-solving pathways
The key is making it large enough that groups of 4-5 students can work on different branches simultaneously without crowding each other.
Impact of Large-Format Thinking Maps on Learning Outcomes
Troubleshooting Common Challenges
Let’s keep it real—implementing large-format thinking maps isn’t always smooth sailing. Here are solutions to challenges I’ve faced:
“Where do we store these massive posters?”
Invest in a map rail system or large portfolio cases. Better yet, photograph completed maps and create a digital gallery. Some teachers even turn them into ceiling tiles!
“This seems expensive…”
Actually, when you calculate the cost per student interaction, it’s incredibly economical. One large thinking map used across multiple classes and units costs pennies per use. Check out funding sources available for educational technology.
“My students will destroy them!”
Start with clear expectations and assigned roles. I use “Map Managers” who oversee different sections. Also, printing on durable outdoor banner vinyl makes them nearly indestructible.
Making It Happen: Your Action Plan
Ready to jump in? Here’s your step-by-step roadmap:
Week 1: Design and Test
• Choose one thinking map template to start
• Create a digital version using free tools like Canva
• Test print on regular paper to check proportions
Week 2: Print and Prepare
• Use your poster printer machine to create the full-size version
• Gather supplies (markers, sticky notes, QR code stickers)
• Plan your lesson introduction
Week 3: Implement and Iterate
• Introduce the map with clear expectations
• Document the process (photos, student feedback)
• Reflect and refine for next time
Ready to Transform Your Teaching?
The journey from traditional graphic organizers to large-format thinking maps might seem like a big leap, but trust me—your students (and your teaching practice) will thank you. Whether you’re tackling complex literary analysis or breaking down scientific processes, these oversized visual tools create opportunities for collaboration, creativity, and deep learning that simply aren’t possible with traditional methods.
The Bottom Line
Creating visual thinking maps with a poster maker for schools thinking maps approach isn’t just about making pretty posters—it’s about fundamentally changing how students interact with content. When you give learners the space (literally!) to explore concepts collaboratively, magic happens. Ideas connect, understanding deepens, and that “aha!” moment becomes a shared celebration.
So grab those templates, fire up your Amplify Poster Maker, and get ready to see your classroom transform into a vibrant learning laboratory. Your students are waiting to think big—literally!
Remember, the best thinking map is the one that gets used. Start simple, think big, and watch your students soar. After all, when we give our learners room to think, there’s no limit to what they can achieve.
#VisualLearning #ThinkingMaps #WholeClassInstruction