The Visual Writing Workshop Revolution

Hey there, fellow first-grade adventurers! Remember that moment when you first saw your students’ eyes light up during writing time? Well, I’ve discovered a game-changer that’s transformed my writing workshops from quiet pencil-scratching sessions into buzzing hubs of creativity. The secret? Using our school poster maker writing process to create interactive editing stations that make writing tangible, visual, and oh-so-engaging!

Why Visual Writing Stations Work Magic

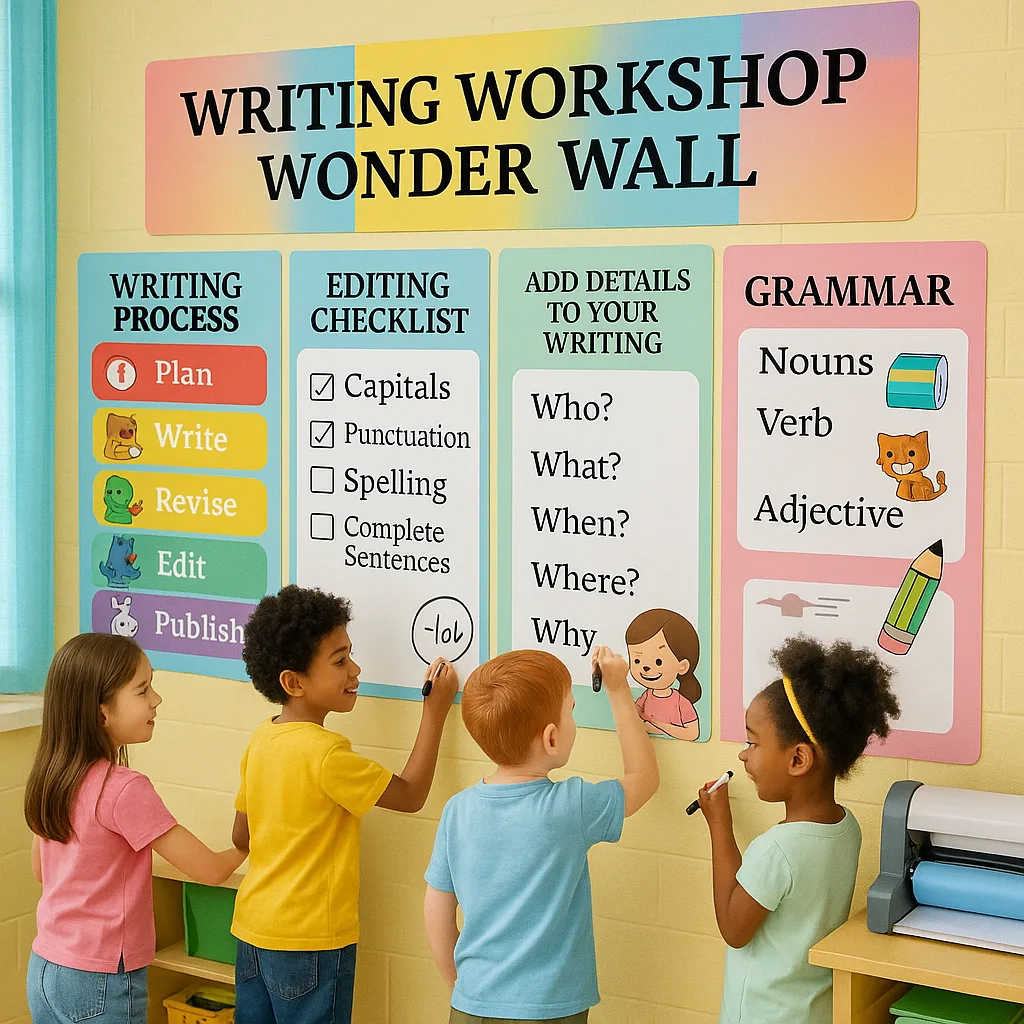
Let me paint you a picture of my classroom before I discovered the power of visual writing stations. Picture this: twenty-five first graders, pencils in hand, staring at blank papers with that deer-in-headlights look. Sound familiar? The writing process felt abstract, overwhelming, and honestly, a bit boring for my little learners.

But then everything changed when I started using our poster machine for schools to create massive, colorful writing aids. Suddenly, the writing process became something my students could see, touch, and interact with. Instead of keeping all those editing rules locked in their heads, they had vibrant visual guides right at their fingertips!

Setting Up Your School Poster Maker Writing Process Station

The Foundation: Choosing Your Space

First things first – location matters! I transformed a corner of my classroom into our “Writing Workshop Wonder Wall.” This dedicated space houses all our visual writing aids created with our school poster maker. The key is making it accessible and at the right height for little ones to interact with comfortably.

Essential Posters for Your Station:

  • Writing Process Steps (with fun characters!)
  • Editing Marks Chart
  • Sentence Starter Menu
  • Word Choice Upgrade Wall
  • Punctuation Party Guide
A close-up view of an interactive editing station created a school poster maker, laminated poster surfaces at child height (about 3 feet from ground). The main focus is on a large "Editing

Creating Interactive Editing Checklists

Here’s where the magic really happens! Using our poster machine for schools, I create giant editing checklists that students can actually interact with. Instead of tiny worksheets that get lost in desks, we have beautiful, laminated posters that serve as reusable editing surfaces.

Capital Letters

Check It!

Look for names, beginnings of sentences, and the word “I”

Flip for editing tips!

End Marks

Check It!

Every sentence needs a period, question mark, or exclamation point!

Interactive learning!

Finger Spaces

Check It!

Put your finger between each word to check spacing

Hands-on checking!

Color-Coded Revision Guides That Pop!

One of my favorite discoveries has been using color-coding to make revision visual and fun. With our school poster maker, I create large revision guides where each type of edit has its own bright, memorable color. This turns abstract editing concepts into something concrete that first graders can grasp immediately.

Our Color-Coding System:

Red = Capitals & Punctuation
Blue = Add Details
Yellow = Word Choice
Green = Great Job!

Laminating Like a Pro: Creating Dry-Erase Magic

Here’s my step-by-step process for creating the perfect laminated editing surfaces:

0
Print on heavyweight paper using your poster machine for schools
0
Trim edges leaving 1/4 inch border
0
Use our Cold Laminator for bubble-free results
0
Mount at student height for easy access

Building Your Visual Grammar Reference Wall

Grammar doesn’t have to be scary or boring! With our school poster maker writing process approach, I’ve created an entire wall dedicated to making grammar concepts visual and accessible. Each poster features bright colors, fun characters, and interactive elements that help students remember the rules.

Must-Have Grammar Posters:

Noun Town: A colorful cityscape where people, places, and things live
Verb Valley: Action-packed scenes showing different verbs in motion
Adjective Alley: Describing words paired with vivid illustrations
Punctuation Park: Each punctuation mark as a fun character with personality
Sentence Structure Street: Building blocks showing how sentences fit together

95%

Student Engagement increase in writing enthusiasm!

Making Abstract Writing Concepts Tangible

The Power of Touch and See

First graders learn best when they can touch, move, and manipulate materials. That’s why I use our poster machine for schools to create writing aids that go beyond traditional charts. Think moveable parts, flaps to lift, and textures to feel!

Interactive Elements That Work:
• Velcro sentence strips for building practice
• Pocket charts for sorting word types
• Flip books attached to posters for examples
• QR codes linking to student writing samples
• Texture samples for descriptive writing

Student Ownership

The best part? Students help create these materials! We use our Campus Pro Poster Maker Ink to print their own writing examples, which become part of our reference wall. Nothing motivates a first grader more than seeing their work displayed professionally!

Practical Tips for Implementation

Ready to transform your writing workshop? Here are my tried-and-true tips for success:

  • Start Small: Begin with one interactive poster and build from there
  • Involve Students: Let them help design and create the posters
  • Rotate Regularly: Keep things fresh by updating displays monthly
  • Connect to Curriculum: Align posters with current writing units
  • Celebrate Usage: Praise students who reference the visual aids

Your Writing Workshop Transformation Awaits!

Creating a visual writing workshop with your school poster maker writing process isn’t just about pretty walls – it’s about giving our youngest writers the tools they need to succeed. When abstract concepts become concrete, when editing becomes interactive, and when grammar becomes a game, that’s when the real magic happens in our classrooms.

Remember, every great writer started with a single word. Let’s give our students the visual support they need to turn those words into wonderful stories!

Share This Story, Choose Your Platform!