Poster Maker Machine File Prep Guide
Understanding Poster Maker Machine File Preparation Basics
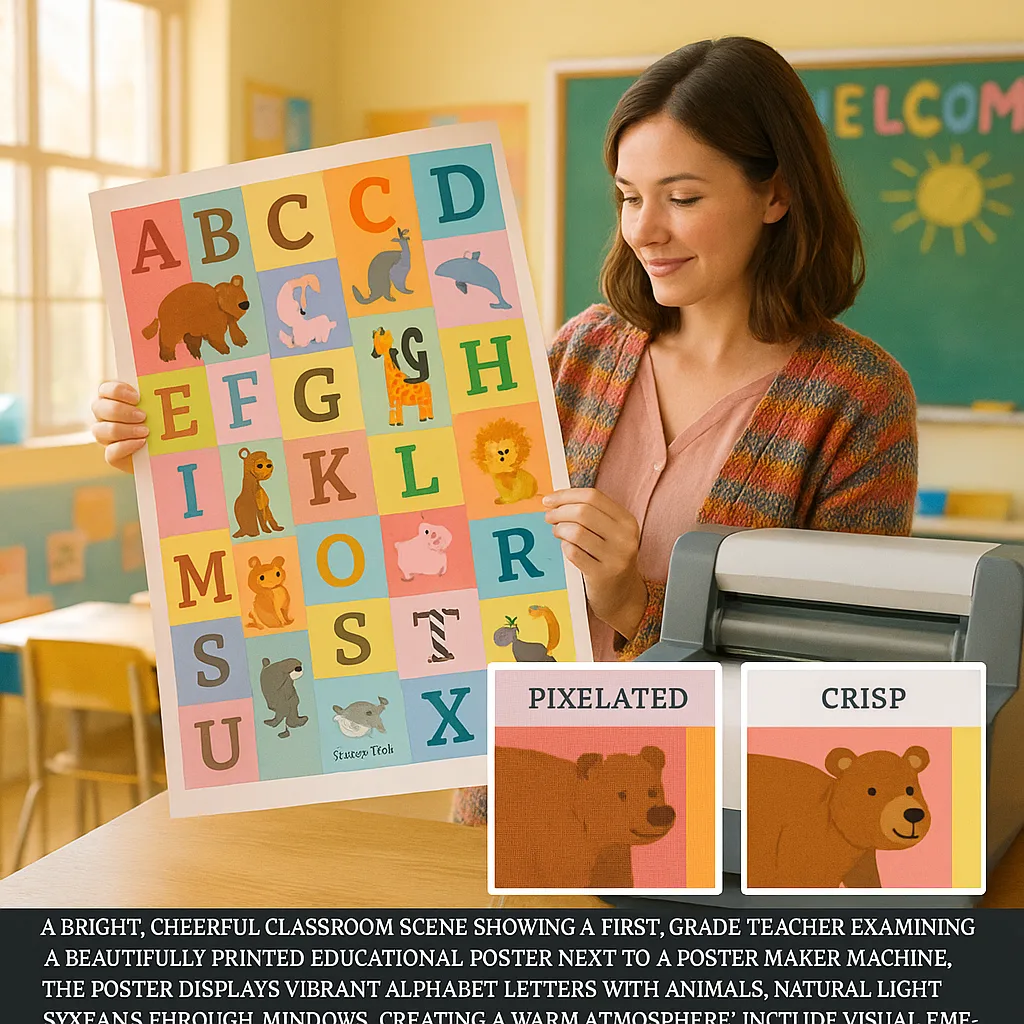
Let me start with a confession – I used to think resolution was just a fancy word tech teachers threw around! However, after wasting way too much paper and ink on blurry prints, I finally dove into understanding what makes a file “print-ready.” The journey has been eye-opening, and now my classroom walls showcase crystal-clear posters that make both students and parents stop in their tracks.
The biggest game-changer was learning that what looks great on my laptop screen doesn’t always translate to a beautiful poster. Screen images display at 72 DPI (dots per inch), while our Classroom Pro 24 Poster Maker Advanced Package needs at least 150-300 DPI for crisp results. This single piece of knowledge transformed my poster-making experience!
Ideal resolution for crisp poster prints
The Resolution Revolution: Getting Your Numbers Right
Web Images
Print Reality
72 DPI works perfectly for screens but creates fuzzy postersStandard Print
Classroom Perfect
150 DPI minimum for acceptable poster qualityProfessional Quality
Gallery Ready
300 DPI creates stunning, professional results arrows flowing toward a poster")
Smart Poster Maker Machine File Preparation: Format Friends and Foes
During my first month teaching, I collected cute graphics from Pinterest like they were Pokemon cards! Unfortunately, I learned the hard way that not all file formats are created equal. Some formats work beautifully with poster printers for schools, while others… well, let’s just say they taught me patience.
Format Champions 🌟
Smartphone Photos: From Selfie to Stunning Poster
I take dozens of classroom photos every week with my phone – student work, reading corners, science experiments, you name it! Initially, these photos looked disappointing when printed large. Now, with a few simple tricks, my phone photos create beautiful posters that capture our classroom memories perfectly.
Common Poster Maker Machine File Preparation Mistakes
The “Stretch to Fit” Disaster
My biggest cringe moment? Stretching a square Instagram photo to fill a rectangular poster. The result? My students looked like funhouse mirror reflections! Always maintain aspect ratios – your subjects will thank you.
The “More is More” Mindset
I used to cram every cute border, font, and clipart onto one poster. Less really is more! Now I focus on one main element with supporting details. My students actually read the posters instead of getting overwhelmed.
The Copyright Catastrophe
Found the perfect image on Google? Hold up! I learned about copyright the hard way when a parent (who happened to be a graphic designer) recognized their work on my poster. Now I use copyright-free resources or create my own.
The “Wing It” Approach
Sending files straight from email attachments to the printer? Recipe for disaster! I always preview files at actual size and check all settings before hitting print. This simple step saves so much paper and ink!

Every poster you create is a chance to inspire young minds. With these file preparation tips and a quality poster maker machine, you’re ready to fill your classroom with learning magic. Happy printing, teacher friends! 🌈