Poster Machine Safety Stories That Students Remember
Hey there, fellow educators! Let’s be real for a minute – we’ve all walked past those mandatory safety posters that blend into the background like educational wallpaper. You know the ones: dense text, boring layouts, and about as engaging as watching paint dry. But what if I told you that your poster maker machine could transform these required safety signs into visual stories that actually capture student attention? Today, we’re diving into how to turn compliance into creativity with poster maker machine safety visuals that students will actually remember.
The Psychology Behind Visual Safety Communication
Here’s where the education buzzword “cognitive load theory” actually comes into play. Traditional safety posters overwhelm students with text-heavy instructions that their brains struggle to process quickly. However, when we use our school poster printers to create visual narratives, we tap into the brain’s natural ability to process images 60,000 times faster than text. This isn’t just trendy edu-speak – it’s neuroscience in action!
Design Principles for Memorable Safety Posters
Let’s break down the essential elements that transform boring compliance posters into engaging visual stories:
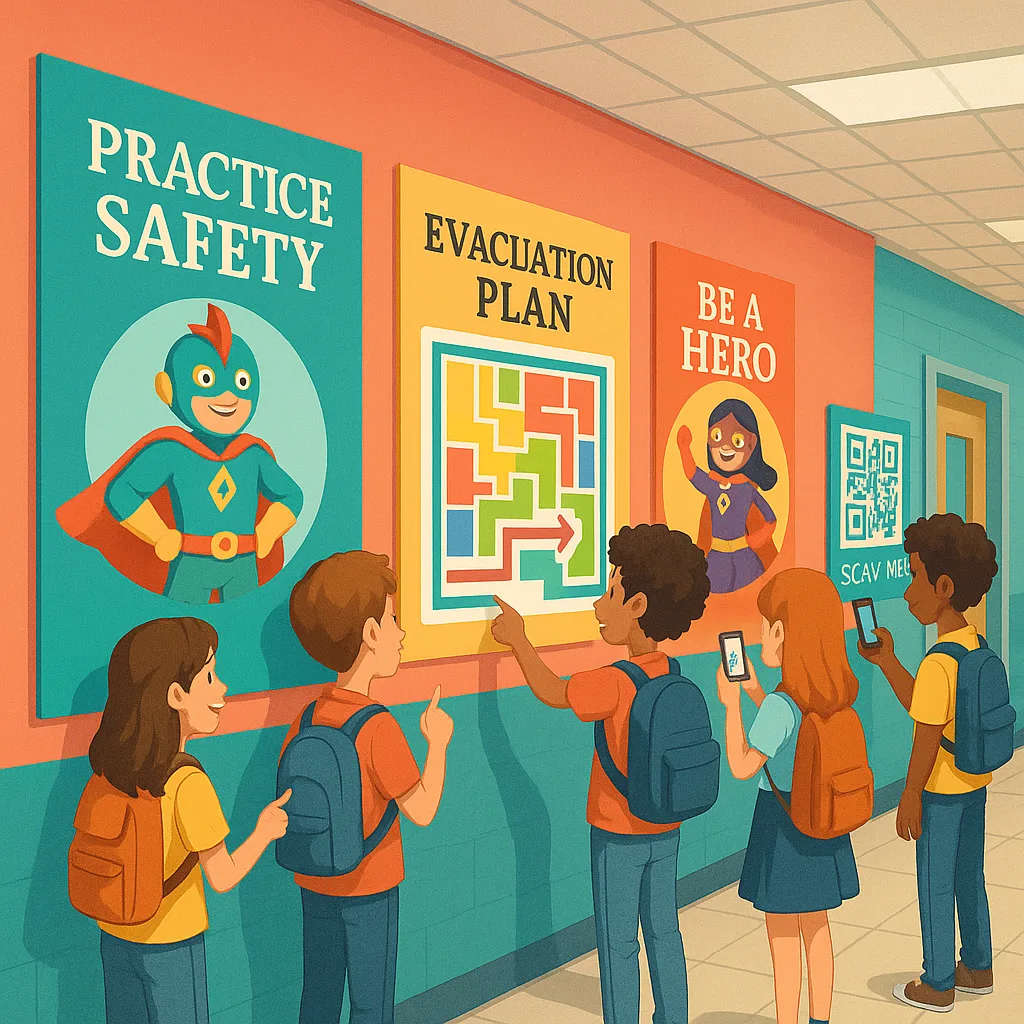
1. Color Psychology That Calms, Not Alarms
While red might seem like the obvious choice for emergency signage, research shows that a balanced palette of teal, coral, and warm yellows actually helps students process information without triggering anxiety. Your Amplify Poster Maker can produce these nuanced colors beautifully, creating posters that inform without intimidating.
2. Visual Hierarchy That Guides the Eye
Start with the most critical action (like “Exit Here”) in large, bold type, then layer supporting information in progressively smaller sizes. This creates what we call “scannable safety” – students can grasp the essential message in seconds.
3. Icons and Symbols That Transcend Language
In our increasingly multilingual classrooms, universal symbols become crucial. Simple, bold icons created with your poster printing equipment can communicate across language barriers.
Interactive Elements That Stick: Making Poster Maker Machine Safety Visuals Memorable
Here’s where we really level up our safety game. Interactive elements transform passive posters into active learning experiences. With your school poster printers, you can create materials that students actually want to engage with.
QR Code Scavenger Hunts
Add QR codes to your safety posters that link to quick video demonstrations or fun safety quizzes. Students can scan during downtime, turning waiting moments into learning opportunities. The Campus Pro 44 Poster Maker Elite Package prints crisp QR codes that scan perfectly every time.
Lift-the-Flap Features
Create posters with simple paper flaps that reveal additional information. Under “What to do in a lockdown,” students can lift tabs to see calm-down breathing exercises or quiet activities.
Glow-in-the-Dark Elements
Using special media available for your poster maker machine, add glow-in-the-dark arrows pointing to exits. This serves a practical purpose during power outages while adding an element of “cool factor” that students remember.
Practical Implementation: Your Poster Maker Machine Safety Visuals Toolkit
Ready to revolutionize your school’s safety signage? Here’s your step-by-step toolkit for creating compelling visual safety stories:
Step 1: Audit Your Current Safety Posters
Walk through your school with fresh eyes. Which posters blend into the background? Which ones actually catch attention? Take notes on what’s working and what needs a visual upgrade.
Step 2: Gather Student Input
Run a quick design thinking session with students. Ask them: “What would make you actually look at and remember a safety poster?” Their insights are golden – I’ve gotten ideas ranging from AR elements to comic book styles.
Step 3: Choose Your Media Wisely
Your poster maker machine can handle various materials. For high-traffic areas, consider durable coated paper or vinyl options. For areas prone to moisture, water-resistant materials ensure longevity.
Step 4: Design with Templates
Start with basic templates but customize heavily. Most school poster printers come with design software that includes safety templates – use these as jumping-off points, not final products.
Step 5: Test and Iterate
Print a few prototypes and observe student reactions. Do they stop and look? Can they recall the information later? Adjust based on real-world feedback.
The Bottom Line: Safety Meets Creativity
Transforming mandatory safety posters into engaging visual stories isn’t just about compliance – it’s about creating a culture where safety information is accessible, memorable, and even enjoyable. Your school poster printers are powerful tools for this transformation, turning required signage into opportunities for creative communication.
Remember, the goal isn’t to make emergencies fun – it’s to ensure that when seconds count, students know exactly what to do because the information was presented in a way their brains could process and retain. By combining sound design principles with interactive elements and a touch of creativity, we can create safety communications that truly serve our students.
So grab those design templates, fire up your poster maker machine safety visuals project, and start creating posters that protect while they engage. Because when it comes to student safety, boring is not an option – memorable is mandatory.
Until next time, keep creating, keep innovating, and keep making learning visual!
#VisualLearning #SafetyFirst #PosterPower