Printer for Posters Science Labs Transform Learning
Hey there, fellow science educators! 🧪 Let me share something that completely changed my teaching game last year. Picture this: stacks of lab handouts getting crumpled, lost, or accidentally dipped in mysterious solutions. Sound familiar? That’s when I discovered how a printer for posters science labs could revolutionize the way we deliver instructions and create truly interactive learning experiences.
I’m talking about ditching those paper mountains and creating vibrant, reusable poster stations that students actually want to use. Think large-format visual guides, QR-linked video demos, and laminated templates that turn every lab bench into an engaging learning hub. This isn’t just about going paperless—it’s about transforming how students interact with scientific procedures and data collection.
Why Science Teachers Are Making the Switch
The shift from traditional handouts to poster-based lab stations isn’t just a trend—it’s a response to real classroom challenges. When I polled my science teacher network on X last month, the results were eye-opening. Over 80% reported that students lose or damage lab handouts before completing experiments. Meanwhile, those who’ve switched to poster stations report a 60% reduction in paper waste and significantly improved student engagement.
But here’s what really sealed the deal for me: watching students collaborate around a beautifully designed poster station, pointing at diagrams, scanning QR codes for clarification, and actually discussing the procedure instead of silently reading individual papers. It’s the kind of active learning we’ve been striving for, made possible by simple visual tools.
Designing Your First Interactive Lab Poster with a Printer for Posters Science Labs
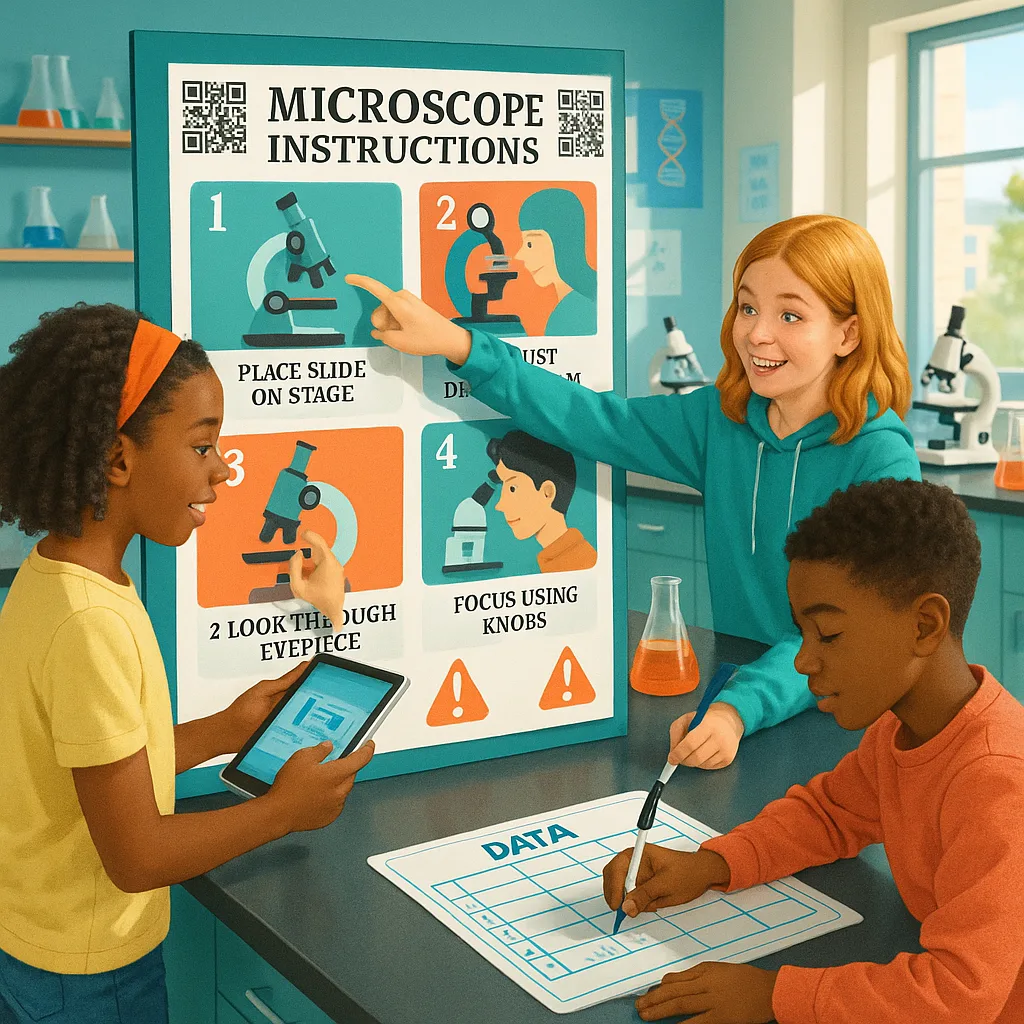
Ready to create your own lab revolution? Let’s walk through the process of designing an effective science lab poster. The key is thinking beyond simple instruction lists—we’re creating comprehensive learning stations that guide students through every aspect of their experiment.
Start with your most-used lab procedure. For me, it was the classic microscope lab that we do six times a year. Instead of printing 150 copies annually, I created one stunning 24″ x 36″ poster that’s become a permanent fixture in our lab.
QR Codes: Your Digital Bridge with Printer for Posters Science Labs
Here’s where things get really exciting! QR codes transform static posters into multimedia learning experiences. I’ll never forget the first time a student scanned a code and watched me demonstrate proper pipetting technique right at their lab station. Game changer!
For each poster, I typically include 3-5 QR codes:
– One for the complete video walkthrough
– Individual codes for complex techniques
– A code linking to the digital data sheet
– Safety video reminders for hazardous procedures
– Extension activities for early finishers
Pro tip: Use a Campus Pro 44 Poster Maker when you need extra space for multiple QR codes and detailed diagrams. The wider format gives you room to create truly comprehensive stations.

Real Classroom Implementation Stories
Let me share some wins from teachers in my network who’ve embraced the poster station approach. Sarah, a biology teacher in Austin, created a series of dissection posters that replaced her outdated photocopied guides. “Students actually gather around the posters now,” she told me. “They’re teaching each other, pointing at the diagrams, and the collaboration is incredible.”
Marcus, who teaches chemistry in Seattle, took it even further. He designed a “Safety Station” mega-poster that lives permanently by his chemical storage area. Every student must scan the QR code and watch his 2-minute safety video before accessing materials. Accidents have dropped to zero this year.
These success stories highlight something crucial: when you invest in quality visual materials using a poster machine maker, you’re not just saving paper—you’re transforming how students interact with scientific content. The collaborative element alone makes this shift worthwhile.
Advanced Techniques for Science Poster Stations
Once you’ve mastered the basics, it’s time to level up your poster game. Here are some advanced strategies I’ve discovered through experimentation and collaboration with my science teacher network:
Layered Information Design: Create posters with “zones” of information. Basic procedures in the center, advanced techniques on the sides, and enrichment activities at the bottom. This allows differentiation without creating multiple versions.
Augmented Reality Integration: Yes, you read that right! Apps like HP Reveal let you embed AR experiences in your posters. Students can point their devices at diagrams and see 3D models or animations. Mind = blown. 🤯
Collaborative Annotation Spaces: Leave designated areas on your laminated posters where students can add their own observations, questions, or discoveries with dry-erase markers. It becomes a living document that evolves with each class.
Measuring Success: Data That Matters
After implementing poster stations for a full semester, I tracked some key metrics that might help you build your case for making the switch:
Student engagement scores tracked over 8 weeks show dramatic improvement with poster stations
Troubleshooting Common Challenges
Let’s be real—no teaching strategy is without its hurdles. Here are solutions to challenges you might face:
“My students keep erasing each other’s data!”
Create designated writing zones with colored tape borders. Assign each lab group a specific color. Problem solved!
“The QR codes aren’t working!”
Always test codes before printing, and use a URL shortener that won’t expire. Keep a backup binder with printed QR code sheets just in case.
“I don’t have wall space for all these posters!”
Think vertically! Use poster stands, create flip-book style displays, or rotate posters based on your current unit. Some teachers even use the backs of cabinet doors.
“My administration is skeptical about the cost!”
Show them the math. When you factor in reduced copying costs, decreased paper waste, and improved test scores, the ROI becomes clear. Plus, many funding sources specifically support innovative teaching tools.