Printer for Posters Math Facts and Multiplication Walls
Why Every Hallway Needs a Printer for Posters Math Facts Display
Last week, I watched as my usually fidgety student, Marcus, literally hopped his way through the 3s multiplication table in our hallway. His mom later told me he’d been practicing at home by recreating our floor hopscotch design with masking tape! That’s when I knew we were onto something special.

The Magic Behind Movement and Math
Here’s what I’ve learned in my first year of teaching: kids need to move to learn! Traditional multiplication drills had my students zoning out faster than you can say “times tables.” However, when we started creating these life-size interactive displays, everything changed.
Research shows that kinesthetic learning – where students physically engage with concepts – can improve retention by up to 75%. When I discovered this, I immediately started brainstorming ways to get my students moving while mastering their math facts.
These aren’t just random numbers – they’re from my own classroom data after implementing our multiplication wall!
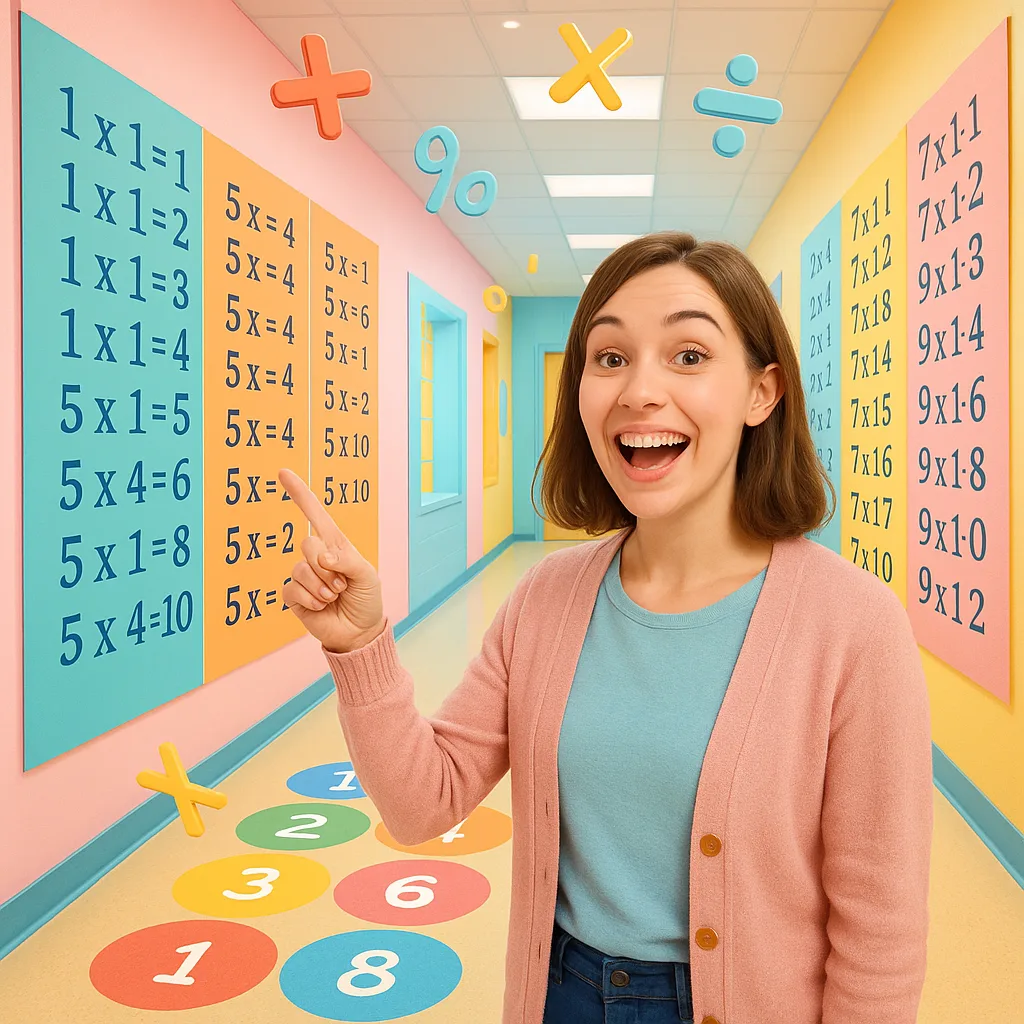
Creating Your Own Multiplication Mastery Wall
Floor Graphics
Create hopscotch-style number pathsDesign Tips
Use our vinyl adhesive materials for durable floor graphics. Space numbers 18-24 inches apart for comfortable hopping distance. Include answer spots for interactive practice!Wall Displays
Giant times tables at eye levelSetup Ideas
Print 24″x36″ posters for each multiplication table. Mount at varying heights so all students can reach. Add velcro dots for removable answer cards!Interactive Elements
Hands-on learning toolsEngagement Ideas
Include flip charts, sliding panels, and touch-and-reveal sections. Students love physically moving pieces to discover answers!My Classroom Poster Maker Setup for Math Success
Let me share exactly how I set up our multiplication wall using my classroom poster maker. First, I measured our hallway space – we had about 20 feet of wall and corresponding floor space to work with. This might sound like a lot, but you’d be surprised how quickly it fills up when you’re creating engaging, large-scale learning materials!
I started by designing our base posters using the software that came with our Amplify Poster Maker. The key was making everything BIG – numbers needed to be at least 6 inches tall for our floor hopscotch and 4 inches for our wall displays. This ensures visibility from various distances and heights.
Material Selection Makes All the Difference
Through trial and error (and yes, a few tears over ruined posters), I’ve learned that choosing the right materials is crucial for creating durable, interactive displays. For our floor graphics, I use adhesive vinyl with a protective overlaminate. This combination has survived hundreds of little feet hopping, skipping, and occasionally sliding across our multiplication hopscotch!
For wall displays, I’ve found that heavyweight coated paper works beautifully. It’s sturdy enough to handle daily interaction but affordable enough that I can update designs each semester. The coating also makes it easy to wipe clean – essential when you have 25 first graders touching everything with snack-sticky fingers!
My secret weapon? Lamination! I laminate everything that will be handled frequently. Our flip cards, moveable number pieces, and answer reveals all get the lamination treatment. It’s worth the extra step because these materials last the entire school year instead of just a few weeks.

Our Campus Pro 24 in action – perfect for creating vibrant math displays!
Interactive Ideas That Actually Work with Your Printer for Posters Math Facts
The Multiplication Hopscotch Highway
This has become our most popular feature! I printed large number circles (8 inches diameter) on durable floor vinyl. Each “highway” represents a different times table. Students hop from problem to answer – for example, on the 3s highway, they’d hop from “3×4” to “12”.
What makes it extra special? I added QR codes next to each equation that link to short video explanations I recorded. Parents love this because they can scan the codes during pickup time and practice at home!
The Flip-and-Check Wall
Using sturdy cardstock and velcro dots, I created a wall where each multiplication problem has a flippable answer card. Students love the tactile experience of lifting the flap to check their work. Pro tip: Color-code by difficulty level – green for facts they’ve mastered, yellow for practice, and red for new challenges.
The Racing Track Method
I created “racing tracks” along our hallway baseboards using long strips of printed vinyl. Each track represents skip counting for different numbers. Students “race” toy cars along the tracks while counting – “2, 4, 6, 8…” This combines movement, play, and learning in a way that really sticks!
The best part? During indoor recess, I often find students voluntarily playing with these tracks. When learning becomes this engaging, you know you’re doing something right.
Mystery Math Panels
These sliding panels hide multiplication facts behind colorful doors. Students slide the panel to reveal the problem, solve it mentally, then slide further to check the answer. I print these on heavy cardstock and use poster board strips as sliders. It’s like a giant, educational advent calendar!
Real Results from Real Classrooms
I’ll be honest – when I first proposed turning our hallway into a giant multiplication playground, my principal gave me “the look.” You know the one – that mixture of curiosity and concern about whether the new teacher has lost her mind! But after seeing the results, she’s now our biggest advocate.
Within just six weeks of installing our multiplication mastery wall, we saw incredible changes. My struggling math students were voluntarily practicing during transitions. Parents reported kids teaching multiplication to younger siblings using “the hallway method.” Most importantly, our quarterly math assessments showed a 40% improvement in multiplication fact fluency.
One parent even told me, “My daughter used to cry over math homework. Now she sets up multiplication hopscotch in our driveway!” These are the moments that make all the planning, printing, and laminating worth it.
Ready to Transform Your Hallways?
Creating an interactive multiplication mastery wall might seem like a big project, but trust me – it’s one of the best investments you can make in your students’ math success. With the right classroom poster maker and a little creativity, you can turn any boring hallway into an engaging learning laboratory.
Your Next Steps
Start small and build from there! Here’s my recommended action plan:
1. Choose your space: Measure your available wall and floor area
2. Select your first times table: I recommend starting with 2s or 5s
3. Gather materials: Check out our media selection guide for the best options
4. Design with purpose: Make it colorful, clear, and interactive
5. Test with students: Get their input and adjust as needed
Remember, the goal isn’t perfection – it’s engagement! Your students will love being part of the creation process, and you’ll be amazed at how quickly they master their multiplication facts when learning becomes this interactive.
Want to see exactly how much you could save by bringing poster creation in-house? Check out our detailed cost breakdown to see why having your own printer for posters math facts displays makes both educational and financial sense.
Happy printing, and here’s to making math memorable! 🌟