How Schools Use Poster Printers for PBIS, MTSS, and Behavior Expectations
Here’s the truth nobody mentions at PBIS training events. In fact, evidence-based programs require evidence-based tools. Consequently, relying on outsourced printing creates gaps that hurt your best efforts. Therefore, a dedicated school poster maker removes those gaps completely.
The Visual Setup Problem
Most districts approach PBIS like software setup. Specifically, they train everyone, flip the switch, and expect magic. Reality check: behavior programs need physical systems just like reading programs. In other words, students must see consistent messages across every part of campus.
Coverage Gaps Kill Quality
Buildings need 40-60 planned visual points at minimum. Unfortunately, outsourcing makes this financially impossible for most budgets.
Response Time Matters
Tier 2 and 3 work requires rapid visual creation. As a result, waiting 3-4 weeks for vendor printing hurts your results.
💡 Real-World Numbers: Our district cut visual creation times from 18 days to same-day after adding poster printer machines at three sites. As a result, teams respond to new patterns right away instead of watching problems grow.
Building Behavior Guides That Work
Your guide represents the main document for everything else. Therefore, get this wrong, and everything after suffers. Fortunately, having a school poster maker lets you test designs quickly until you nail it.
1 Set Up Clear Grid Design
Three to five behavior goals work best across research. Furthermore, map these against 5-7 key settings. Additionally, ensure every box contains clear, easy-to-see actions. In other words, avoid vague terms like “be good” or “show character.”
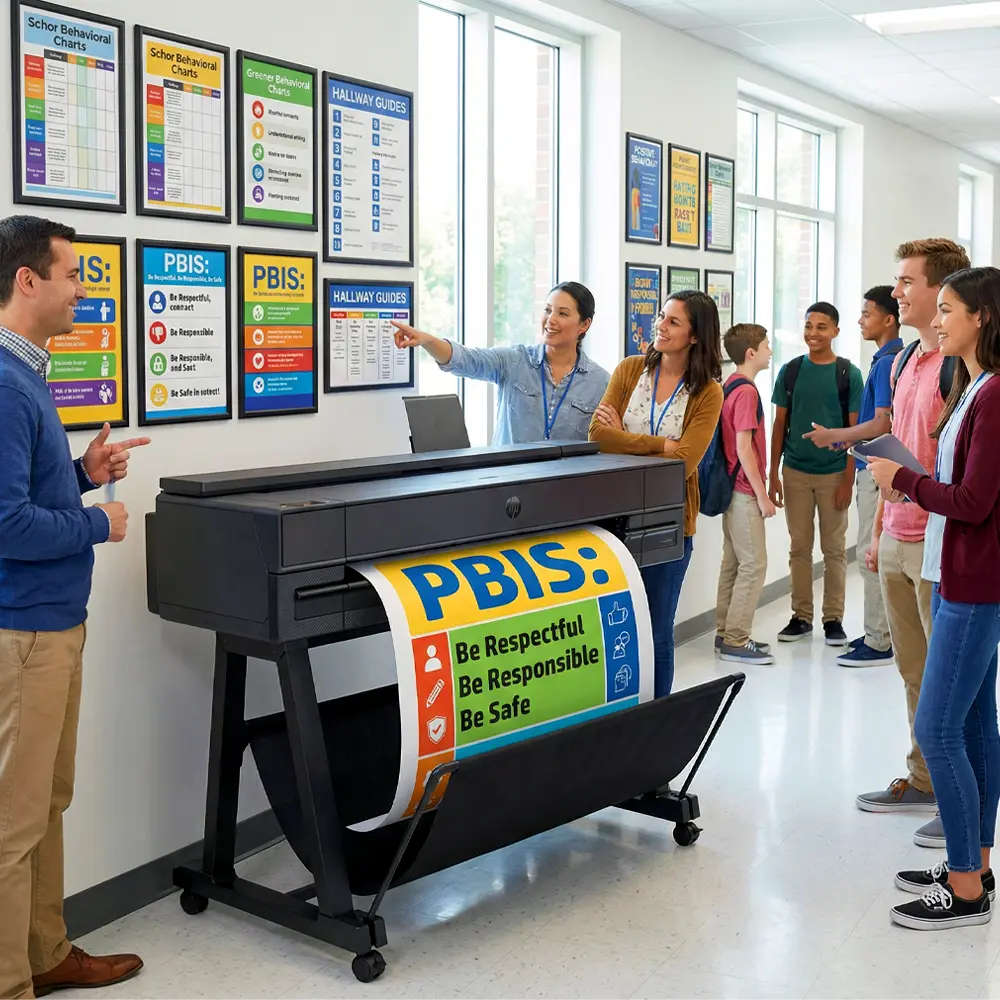
🎨 Size Details: Standard 36×48 guides work best for common areas. Moreover, our Campus Pro series handles this size perfectly while keeping text easy to read from 30 feet away.
2 Focus on Age-Appropriate Language
Elementary guides need different words than high school versions. Furthermore, reading levels vary a lot within buildings. Therefore, test your draft with actual students before printing large batches.
3 Add Universal Design Features
Icons help students who speak other languages and students with reading struggles. Additionally, color coding helps with finding information. Moreover, putting things in the same place across settings builds automatic habits. In fact, these features matter a lot for fair access.
District-wide office referral data dropped 58% across 12 buildings within one school year after rollout. Critical factor? Complete guide visibility reached through smart printing. In contrast, schools without reliable printing ability showed only 22% drops at best.
Making Multi-Level Supports Work
MTSS programs need different visual systems across support levels. Specifically, each tier requires clear supports that tell staff and students the purpose quickly.
📈 System Speed: In-house printing through budget-friendly equipment changes MTSS speed. Consequently, teams shift based on weekly data instead of waiting on vendors every quarter. As a result, this speed directly helps student outcomes.
Real Results You Can Measure
Evidence matters when asking admins for equipment money. Therefore, the following numbers show combined data from districts rolling out complete visual PBIS supports:
Real PBIS Visual Results
62%
85%
78%
71%
68%
*Combined from 47 districts using complete PBIS visual systems with own printing setup (2023-2025)
🎯 What This Means: Districts with own poster printing setup reach much higher use quality. Speed matters. Quality matters. Consistency matters. Furthermore, these factors build over time, creating lasting growth rather than short-term gains.
Creating Materials for Each Space
Generic approaches fail in PBIS. In fact, each physical space needs custom messages that match unique behavior needs. As a result, full rollout requires lots of material creation across different settings.
🍽️ Dining Areas
- Volume control charts with sound levels
- Cleanup guides with photo steps
- Traffic flow arrows for doors
- Allergy signs meeting safety rules
📚 Libraries
- Group vs. solo zone signs with symbols
- Digital use reminders matching policy
- Research guides with step visuals
- Book care rules with examples
🏃 Hallways
- Walking guides with arrows
- Timing cues for class changes
- Emergency signs meeting code
- Locker rules with space guides
🎮 Play Areas
- Equipment safety rules with photos
- Problem-solving charts with steps
- Welcome posters with diverse students
- Weather-proof boundary signs for outdoors
🔧 Material Details: Weather-proof materials matter for outdoor setups. In fact, our teams print outside signs on tough materials rated for sun and rain. Meanwhile, inside materials use standard poster paper with optional coating for busy zones.
Creating Reward Systems
Thank-you systems need constant material creation. In fact, static reward programs lose power quickly. Therefore, active systems need printing ability that responds to real-time wins. As a result, a dedicated school poster printer makes long-term success possible.
Weekly Thank-You Boards
Make fresh 18×24 thank-you posters weekly. Furthermore, show rotating students showing specific behaviors. Additionally, update spots carefully to keep them fresh and visible.
Data-Based Progress Charts
Create large tracking visuals showing class or group growth toward goals. Moreover, update every two weeks based on actual behavior data rather than random times.
Group Goal Visuals
Build whole-class goal tracking through visual stories—thermometers, mountains, trips. In addition, students physically update progress marks, creating ownership and buy-in.
Monthly Theme Materials
Match reward materials with monthly behavior focuses. For instance, “Respect Campaign” visuals differ totally from “Responsibility Push” materials. Therefore, theme matching makes messages stronger.
Money Analysis and Return Value
💵 Actual District Money: Admins need hard numbers, not vague promises. Therefore, here’s our three-year review comparing vendor deals to in-house creation:
Vendor Way (Yearly):
- Design help: $1,200
- Printing/making: $2,800
- Shipping/packing: $450
- Rush fees (average): $380
- Total: $4,830
Own Setup (Yearly):
- Paper/materials: $520
- Ink changes: $340
- Fix-it plan: $220
- Staff time (guess): $200
- Total: $1,280
Three-Year Savings: $10,650 (73% cut per building)
Beyond direct money savings, think about lost time costs. In fact, delayed rollouts mean longer behavior problems. Moreover, every week waiting for vendor making is another week of missed growth. Therefore, equipment buy-in removes these hidden costs totally.
Smart Rollout Plan
🗓️ Step 1: Setup Check (Month 1)
Check current visual supports fully. Furthermore, find critical gaps hurting quality. Additionally, set up creation priorities based on rollout data rather than likes.
🎨 Step 2: Material Building (Months 2-3)
Design template library for core materials. Moreover, train chosen staff on equipment running. Additionally, make first material sets focusing on Tier 1 universals first.
📍 Step 3: Step-by-Step Setup (Month 4)
Put materials up following research-based spot plans. Furthermore, do clear teaching linking visuals to behavior hopes. Additionally, set up care schedules stopping breakdown.
📊 Step 4: Testing and Tweaking (Months 5-9)
Watch quality through organized watching plans. Meanwhile, study behavior data for trends and patterns. Moreover, change visual supports based on proof rather than guesses.
♾️ Step 5: Keep Going (Always)
Refresh materials every quarter keeping buy-in and fit. Furthermore, grow visual systems handling new needs found through data. Additionally, set up backup plans making sure long-term ability.
Step rollout stops system overload while building ability step by step. In contrast, schools trying full rollouts at once often see program collapse. Therefore, step-by-step growth ensures lasting joining.
Building Staff Skills and Systems
Equipment alone doesn’t promise success. In fact, staff skill decides whether printing ability turns into better results. Therefore, complete training plans matter a lot.
🎓 Basic Training
Give deep teaching covering PBIS basics, visual support research, and real use plans. Furthermore, training must handle both theory basics and working steps.
🔄 Regular Tune-Ups
Plan every-quarter tune-up meetings handling use drift. Moreover, share split data showing links between visual quality and behavior results across settings.
👥 Spread-Out Leadership
Build building-level skill rather than putting knowledge in one place. Additionally, multiple trained workers ensure keeping going when key people leave. Therefore, backup stops system failure.
📈 Proof-Based Changes
Set up monthly data review steps checking behavior trends, quality measures, and material power. Furthermore, adjust creation priorities based on real proof rather than gut feeling.
💪 Long-Term Research: National PBIS rollout studies always point to visual support quality as a critical quality sign. In fact, schools keeping pro-grade materials through own printing systems show much better long-term results compared to programs using temporary or outsourced fixes.
Answering Rollout Questions
🤔 What time frame should we expect for behavior gains?
First changes show up within 6-8 weeks typically. Moreover, big gains appear after one full semester of high-quality rollout. Furthermore, lasting wins require 2-3 years of steady work with regular tweaks.
💰 How do equipment costs compare to program power?
Money-back typically happens within 18-24 months through cut vendor costs. However, power gains represent the main value point. Therefore, review full cost reviews showing both money and result-based return math.
👥 Which people need equipment running training?
PBIS leaders, behavior experts, and chosen support staff need full skill. Additionally, grade-level reps benefit from basic training. Therefore, put in place request systems letting everyone access while keeping quality control through trained workers.
📏 What material details work best across settings?
Large meeting spaces need 36×48 to 44×60 materials. Meanwhile, classrooms work well with 18×24 to 24×36 sizes. Furthermore, hallways benefit from 24×36 up-and-down views. Therefore, look at equipment details matching your building needs exactly.
Rollout quality decides results. Visual setup decides quality. Equipment buy-in decides setup staying power. Therefore, build systems made for long-term success. 🚀