Classroom Poster Maker Lab Labels for Safety That Sticks
Why Classroom Poster Maker Lab Labels Matter More Than Ever
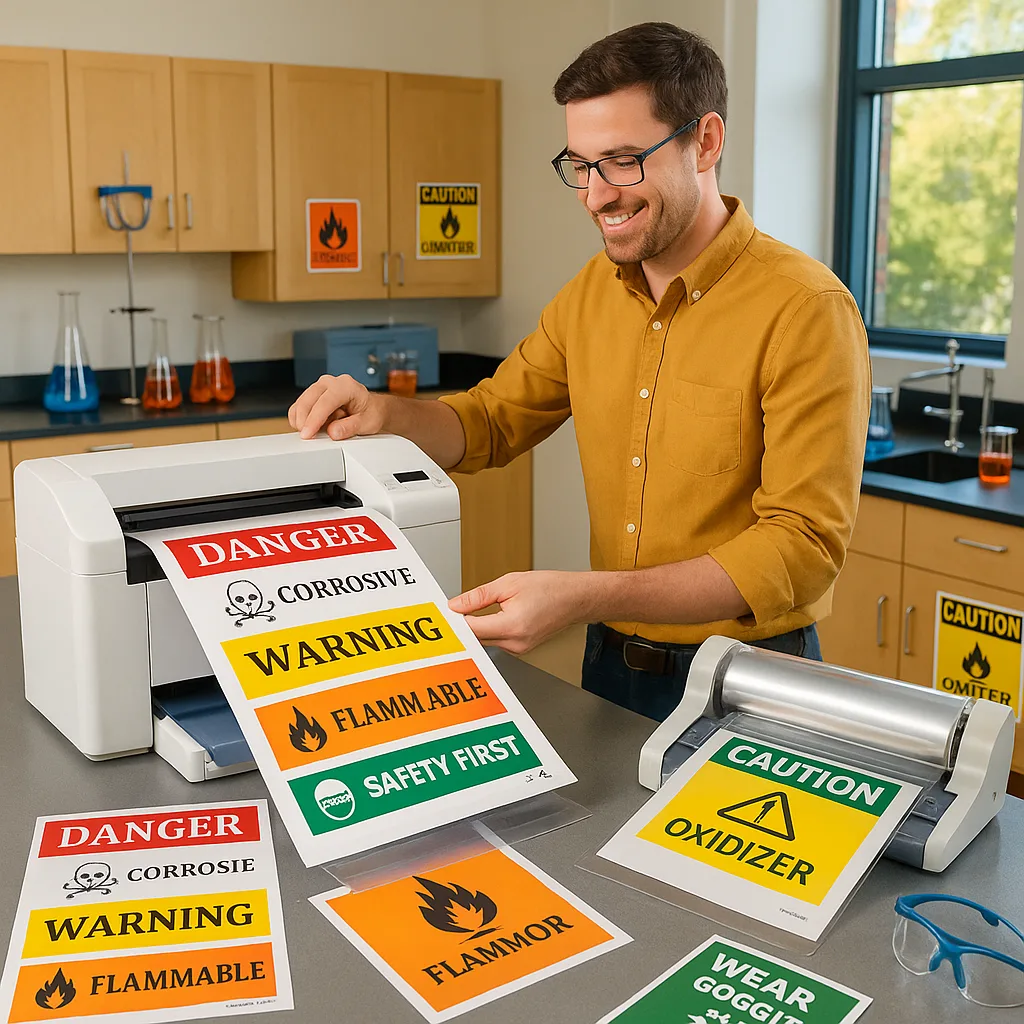
Picture this: It’s the third week of school, and your carefully handwritten chemical storage labels are already peeling, fading, or completely illegible thanks to that inevitable formaldehyde splash. Sound familiar? This is where the magic of proper lamination comes in, transforming your science classroom from a labeling nightmare into a model of safety and efficiency.
The beauty of using your poster printer for creating lab labels goes beyond just making them look professional. When you combine high-quality printing with the right lamination techniques, you’re creating safety tools that:
• Resist chemical spills and splashes
• Withstand daily handling by dozens of students
• Remain readable under harsh fluorescent lighting
• Stay adhered through temperature fluctuations
• Meet district safety compliance standards

Well-organized lab with laminated safety labels
The Science Behind Lamination Success
Optimal heat setting for most school laminators
Recommended thickness for high-traffic lab areas
Longer lifespan than unlaminated labels
Hot vs. Cold Lamination: Making the Right Choice
Here’s where we get into the nitty-gritty that your Twitter edu-friends are probably debating right now! The lamination method you choose can make or break your label’s durability in a science classroom environment. Let me break it down for you:
• Superior chemical resistance
• Stronger adhesion for heavy-use areas
• Crystal-clear finish
• Professional appearance
Hot lamination is your go-to for labels that need to withstand serious abuse. Think chemical storage cabinets, fume hood instructions, and emergency equipment markers. The heat activates adhesives that create an almost impenetrable barrier against moisture and chemicals.
• No electricity required
• Safer for student projects
• Works with heat-sensitive materials
• Instant application
Cold lamination has its place too! It’s perfect for temporary labels, student-created safety reminders, or when you need to laminate materials printed on your Campus Pro 24 Poster Maker that might be heat-sensitive.
Visual Hierarchy That Saves Lives
When designing safety labels with your poster printer, remember that in an emergency, every second counts. Your labels need to communicate instantly and clearly. Here’s my tried-and-true formula:
Color Coding for Quick Recognition
The best poster printer for schools will give you vibrant color options that can literally be lifesavers in your lab. Here’s my go-to color system that aligns with international safety standards:
• Red: Immediate danger, fire equipment
• Orange: Warning, biological hazards
• Yellow: Caution, reactive chemicals
• Green: Safety equipment locations
• Blue: Mandatory PPE requirements
Font Choices That Make a Difference
Skip the fancy scripts! For lab labels, stick with sans-serif fonts like Arial or Helvetica at a minimum of 14-point size. If you’re labeling overhead storage, go even bigger—remember, someone might need to read these labels through safety goggles while dealing with an emergency.
Troubleshooting Common Lab Label Fails
Even the best of us face lamination challenges! Here are solutions to the most common issues I see in science classrooms:
Solution: Increase laminator temperature by 5-10°F and slow down feed speed. Also, ensure you’re leaving adequate borders for proper adhesion.
Solution: This usually means moisture was trapped during lamination. Always let prints dry completely, and consider using a dehumidifier in humid climates.
Solution: Upgrade to 5-mil or thicker lamination film, and consider pigment-based inks which offer better chemical resistance than dye-based alternatives.
Take Your Lab Safety to the Next Level
Creating professional, durable lab labels isn’t just about compliance—it’s about creating a culture of safety and organization that empowers your students to work confidently in STEM environments. When you invest in the right tools and techniques, you’re investing in your students’ future as scientists, engineers, and innovators.
Ready to revolutionize your lab organization? Check out our total cost of ownership guide to see how a classroom poster maker can transform not just your lab labels, but your entire visual communication strategy. Whether you’re creating safety signage, equipment labels, or student achievement displays, having the right tools makes all the difference.