Poster Machines Timeline Murals Social Studies
Visual Storytelling That Makes History Click
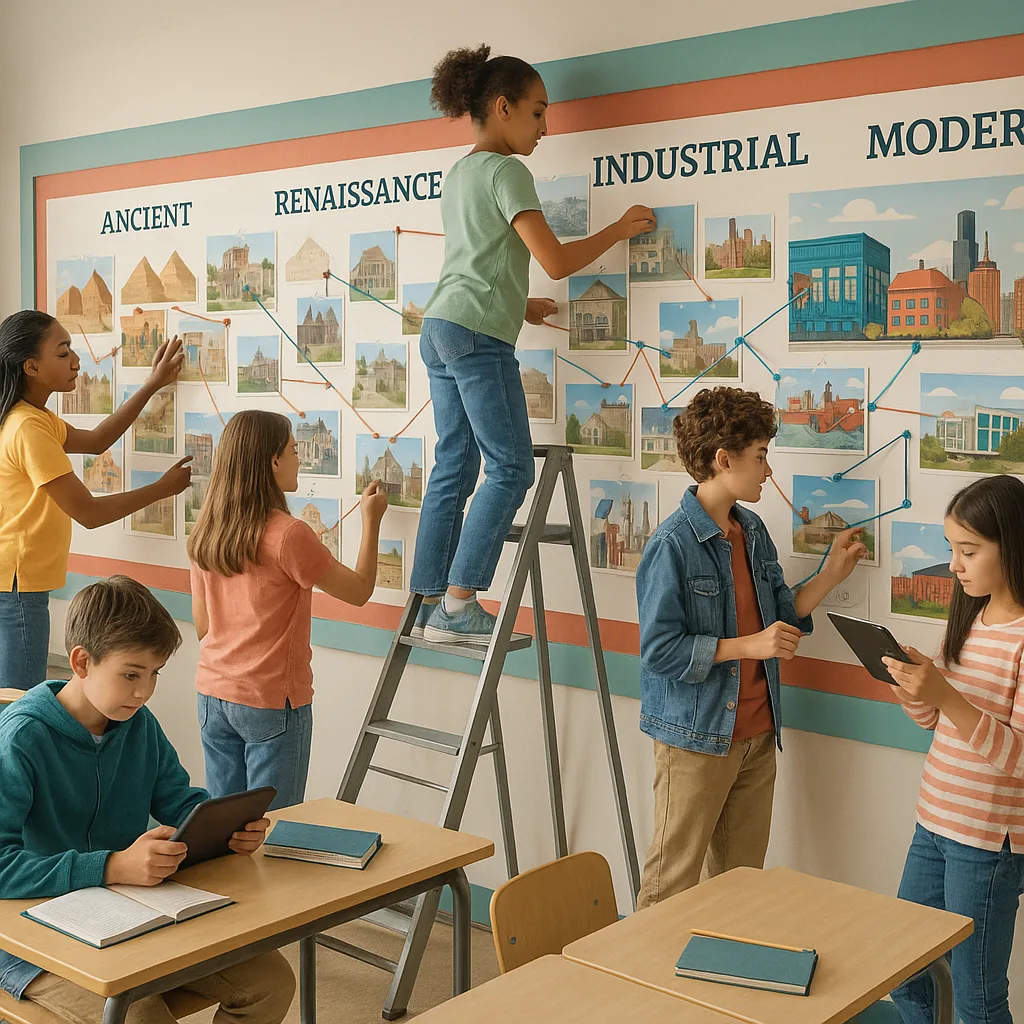
Transform your social studies classroom into a time-traveling adventure with collaborative timeline murals
Hey there, history champions! Ready to turn your classroom walls into epic time-travel portals? Creating timeline murals with poster machines timeline murals is one of those teaching strategies that gets me doing happy dances in the hallway. After eight years of watching middle schoolers’ eyes glaze over during traditional history lessons, I’ve discovered that visual storytelling through collaborative murals is pure magic for making those cause-and-effect connections stick.
Why Timeline Murals Rock for Middle School Minds
Let’s be real—seventh graders aren’t exactly known for their attention to chronological details. But here’s what I’ve learned: when students physically create and connect historical events on a massive visual timeline, something clicks. It’s like watching puzzle pieces snap together in their minds. The beauty of using poster maker machine for schools is that we can print sections at whatever scale works for our space, then piece them together into one cohesive story.
Research backs this up too! Visual-spatial learning activates different neural pathways than text-based instruction alone. When students collaborate on timeline murals, they’re not just memorizing dates—they’re building mental models of how events connect across time. Plus, the collaborative aspect taps into social-emotional learning (SEL) principles, fostering teamwork while deepening content understanding.

Pro tip: I create these templates in Canva or Google Drawings, then share them with student teams. They can customize colors, fonts, and layouts while maintaining the overall structure. This approach supports Universal Design for Learning (UDL) principles by providing multiple means of representation and expression.
Making Historical Connections Visual
This is where the magic happens! Instead of isolated facts floating in space, timeline murals created with poster machines help students literally draw connections between events. I’ve seen kids have “aha!” moments when they realize the American Revolution influenced the French Revolution, or when they trace economic patterns leading to the Great Depression.
Assessment and Reflection Strategies
Traditional tests can’t capture the depth of learning that happens during timeline mural projects. Instead, I use a multi-faceted approach that values both process and product. The beauty of using a poster maker machine for schools is that we can print individual portfolio pieces for assessment while keeping the main mural intact.
My assessment toolkit includes:
Process Portfolios: Daily reflection journals documenting research discoveries and collaboration challenges. Students photograph their work-in-progress and annotate their thinking.
Peer Evaluations: Teams assess each other’s sections using student-created rubrics focusing on historical accuracy, visual impact, and connection clarity.
Presentation Performances: Each team leads a “museum tour” of their section, fielding questions from classmates and demonstrating deep understanding.
Connection Challenges: Students must identify and explain three connections between their section and another team’s work—this really shows systemic thinking!
Tips for Timeline Mural Success
After countless timeline projects (and a few spectacular failures), here’s my hard-earned wisdom:
✓ Start small—pilot with one unit first
✓ Create exemplars showing quality work
✓ Build in flex time for printing delays
✓ Celebrate mistakes as learning moments
✓ Document everything for next year
✗ Rush the research phase
✗ Micromanage creative choices
✗ Forget to test print sizes first
✗ Skip collaboration protocols
✗ Assume tech will always work
Beyond the Classroom: Community Connections
Timeline murals shouldn’t live in isolation! Last year, we partnered with our local historical society to display sections at the town library. The poster machines allowed us to print weather-resistant versions for outdoor display during our spring festival. Talk about authentic audience!
Community partnership ideas:
• Collaborate with local museums for research support
• Invite community elders to share oral histories
• Display murals at public buildings during relevant heritage months
• Create traveling versions for elementary school visits
• Partner with high school students for peer mentoring
Resources and Next Steps
Ready to jump in? Start by checking out these resources:
Template Library: I’ve created a Google Drive folder with editable templates for major historical periods. Feel free to adapt them for your curriculum!
Assessment Rubrics: Student-friendly rubrics that emphasize both historical thinking skills and visual communication.
Tech Tutorials: Quick videos showing how to create QR codes, use design software, and optimize files for printing.
Material Calculations: Wondering about costs? Check out detailed printing cost breakdowns to help with budgeting.
Ready to Transform Your History Classroom?
Creating timeline murals with poster machines isn’t just another project—it’s a paradigm shift in how students connect with history. When they see their work displayed prominently, when peers and community members engage with their research, when those cause-and-effect lightbulbs start flickering on… that’s when you know you’re onto something special.
So grab those markers, fire up the design software, and get ready to watch your students become visual historians. Trust me, once you see their faces light up as they connect the dots across centuries, you’ll never want to go back to textbook timelines again!