School Poster Maker Machine Sensory-Friendly Design

Understanding Neurodiversity in the Classroom
Let me share a story that changed my perspective on classroom visuals. During a consultation at an elementary school, I observed a bright, capable student with autism who would consistently shut down during math lessons. After careful observation, we discovered that the busy, colorful math posters surrounding the whiteboard were overwhelming his sensory system. Subsequently, when the teacher created calmer, more organized displays using their Classroom Pro 24 Poster Maker Advanced Package, the student’s engagement improved dramatically.
Neurodiversity encompasses the natural variations in how our brains process information. For instance, some students thrive in visually rich environments, while others need minimal stimulation to focus effectively. Additionally, research from occupational therapy journals shows that approximately 1 in 6 children experience sensory processing challenges that affect their learning. Therefore, creating sensory-friendly poster displays isn’t just an accommodation—it’s a universal design principle that benefits all learners.
School Poster Maker Machine Sensory-Friendly Design Principles

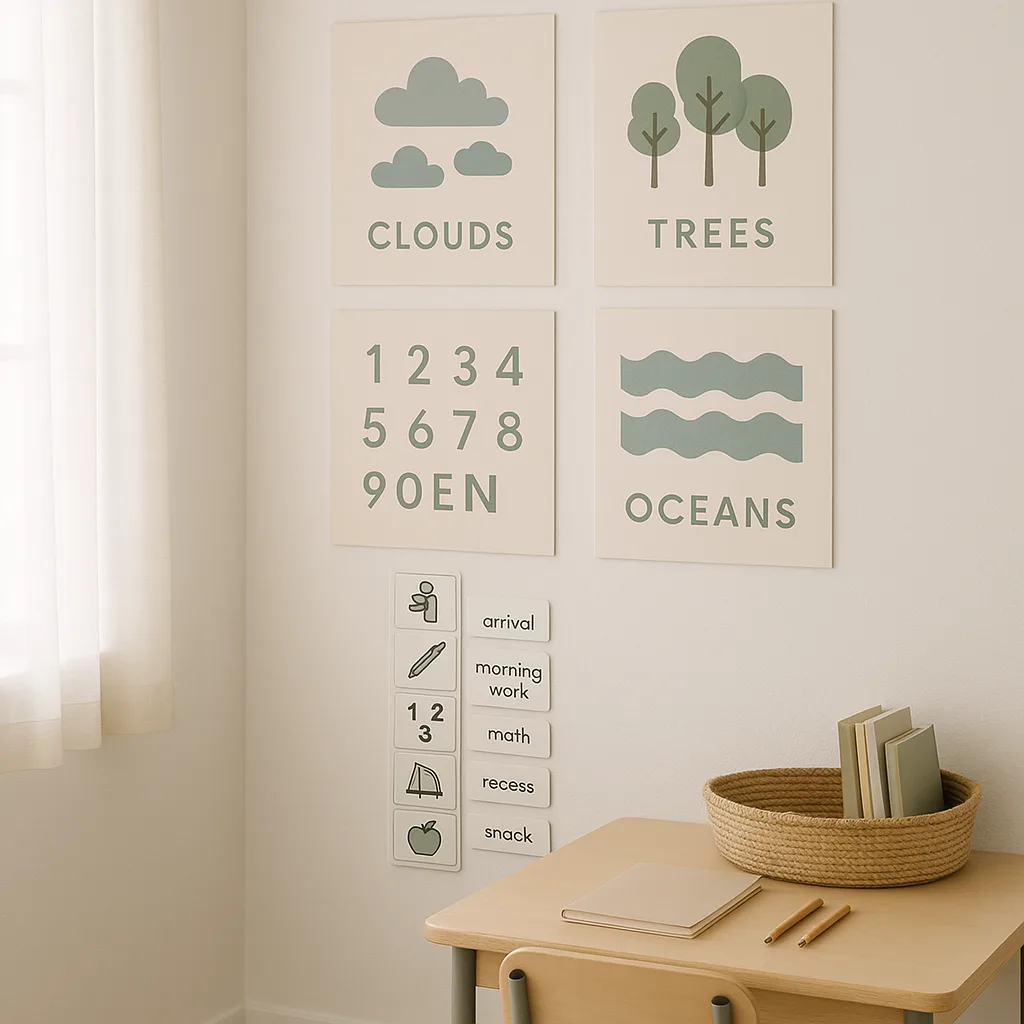
Thoughtful Color Selection
Use nature-inspired palettes with 60% neutral base, 30% soft accent colors, and 10% gentle highlights for optimal sensory comfort.
Reduced Visual Clutter
Studies show 85% of neurodivergent students perform better with simplified visual displays featuring clear white space.
Nature-Based Visuals
70% reduction in anxiety levels when classrooms incorporate nature imagery and organic shapes in poster designs.
School Poster Maker Machine Sensory-Friendly Implementation Guide
Let me walk you through creating your first sensory-friendly poster using tools available at schoolpostermakers.com. Subsequently, you’ll see how the right equipment and approach can transform your classroom environment.
Step 1: Choose Your Poster Maker Wisely
When considering poster printer price options, remember that investing in quality equipment pays dividends in student well-being. For example, the Amplify Poster Maker offers precise color control essential for creating soothing visual displays. Additionally, its ability to produce matte finishes reduces glare, which can be particularly troublesome for students with visual sensitivities.
Step 2: Select Appropriate Media
The texture and finish of your posters matter significantly. Therefore, consider using matte papers that minimize glare and reflection. Furthermore, the various media options available allow you to choose surfaces that feel comfortable to touch for students who seek tactile input.
Step 3: Design with Intention
Start with templates that embrace simplicity. Moreover, use sans-serif fonts like Open Sans or Arial at minimum 18-point size for body text. Subsequently, ensure a contrast ratio of at least 7:1 between text and background for students with visual processing challenges.
Budget-Conscious Implementation Strategies
Understanding that poster printer price considerations are crucial for schools, I’ve developed cost-effective approaches to creating sensory-friendly environments. Initially, you might feel overwhelmed by equipment costs, but let me show you how strategic planning makes this achievable for any budget.
Maximizing Your Investment:
A quality poster maker quickly pays for itself compared to outsourcing. For instance, creating 50 sensory-friendly posters externally could cost $1,500-$2,000, while producing them in-house costs under $200 in materials. Moreover, you gain complete control over design elements crucial for sensory considerations. The detailed cost breakdown shows exactly how affordable in-house printing becomes.
Funding Opportunities:
Many schools successfully use special education or inclusion grants to purchase poster makers. Additionally, various funding sources specifically support creating accessible learning environments. Furthermore, parent organizations often enthusiastically fundraise for initiatives that demonstrably improve student well-being.
Phased Implementation:
Start with high-impact areas like calm-down corners or resource rooms. Subsequently, expand to common areas as budget allows. Therefore, you can demonstrate value while building support for broader implementation.
Measuring Success and Continuous Improvement
Creating sensory-friendly posters is an ongoing journey, not a destination. Therefore, I encourage you to regularly assess and adjust your visual environment based on student responses. Here’s my evidence-based approach to measuring impact:
Observational Assessments:
Document student behavior before and after implementing sensory-friendly posters. For example, track engagement duration, transition success rates, and self-regulation incidents. Moreover, involve students in the evaluation process through age-appropriate feedback methods.
Environmental Audits:
Quarterly, walk through your space with “sensory glasses” on. Additionally, consider factors like lighting interaction with poster surfaces, viewing angles from different heights, and potential sensory triggers. Furthermore, invite occupational therapists or special education specialists to provide fresh perspectives.
Student Voice Integration:
Create opportunities for neurodivergent students to share their experiences. Subsequently, you might discover that what seems calming to neurotypical individuals feels different to students with sensory differences. Therefore, authentic inclusion means centering their perspectives in design decisions.
Ready to Transform Your Classroom?
Download our free Sensory-Friendly Poster Design Checklist and start creating inclusive visual environments today. Additionally, explore our comprehensive cost analysis to make an informed decision about bringing poster-making capabilities to your school.