Visual Emergency Guides for Special Needs Students
 Stop symbol, 2)")
Understanding the Unique Needs of Special Learners During Emergencies
Emergency situations trigger heightened stress responses in all students, but for those with autism, anxiety disorders, sensory processing differences, or intellectual disabilities, the impact can be overwhelming. Traditional verbal instructions and loud alarms often increase panic rather than promote safety. Therefore, visual emergency guides serve as essential tools for creating predictable, understandable procedures that students can follow even when verbal processing becomes difficult.
Research from the Journal of School Psychology demonstrates that visual supports reduce emergency-related anxiety by up to 60% in students with special needs (Morrison et al., 2023). Moreover, these visual aids benefit all students by providing multiple modes of communication during high-stress situations.
When schools invest in poster printer for schools like the Amplify Poster Maker, they gain the ability to create customized emergency guides tailored to their specific student populations and building layouts. Subsequently, this investment supports both safety compliance and inclusive education practices.
Symbol Systems That Work: Poster Maker Machines for Emergency Guides
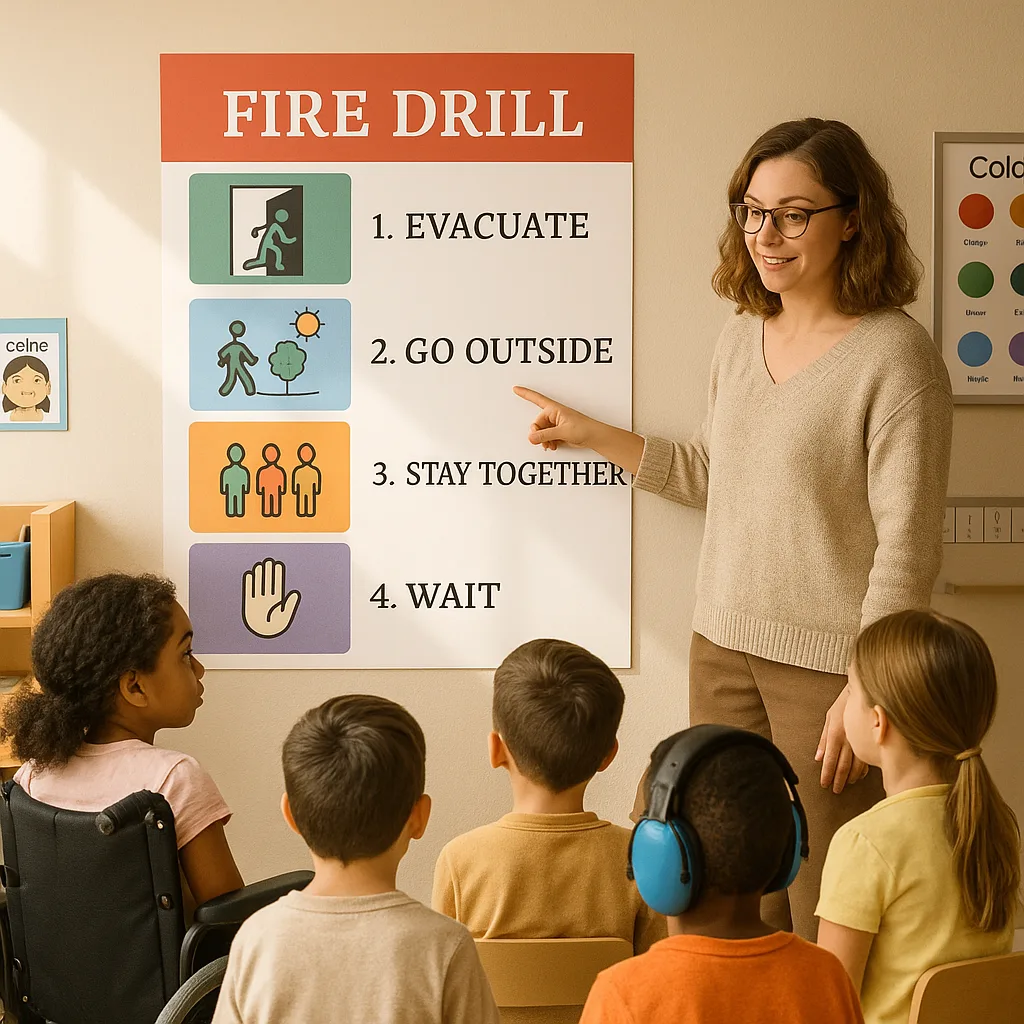
Effective symbol systems form the foundation of accessible emergency guides. Furthermore, these systems must be consistent across all safety materials to prevent confusion during critical moments. When designing with poster maker machines for emergency guides, consider implementing these evidence-based symbol approaches:
Universal Design Symbols: Use internationally recognized symbols like the exit sign, fire symbol, and gathering point icons. Additionally, pair these with simple text labels in both English and other languages spoken in your school community.
Boardmaker-Style Icons: For students familiar with augmentative communication systems, incorporate similar visual vocabulary. Consequently, this creates continuity between daily communication tools and emergency procedures.
Photo-Based Sequences: Some students respond better to photographs than abstract symbols. Therefore, create photo sequences showing actual locations and people in your building performing safety actions.
Strategic Placement for Emergency Visual Guides
Placement strategy determines whether visual guides effectively support students during emergencies. Moreover, considering sensory sensitivities and physical accessibility ensures all students can benefit from these resources.
Primary Placement Zones:
Eye-Level Installation: Mount guides at multiple heights to accommodate wheelchair users and students of different statures. Additionally, ensure adequate spacing between posters to prevent visual overwhelm.
Transition Areas: Position guides near doorways, stairwells, and major hallway intersections where students naturally pause. Subsequently, this allows for quick reference without creating bottlenecks.
Calm-Down Spaces: Install simplified versions in sensory rooms and quiet areas where overwhelmed students might retreat. Therefore, even students in distress can access safety information.
Classroom Zones: Create designated “safety corners” with all emergency guides displayed together. Furthermore, practice referencing these locations during non-emergency times to build familiarity.
Creating Comprehensive Visual Emergency Systems
Building an effective visual emergency system requires coordinated planning across multiple stakeholders. Furthermore, regular review and updates ensure continued effectiveness as student needs evolve.
Development Team Components:
Special education teachers bring expertise about individual student needs and communication preferences. Additionally, occupational therapists contribute sensory regulation strategies and motor planning considerations. School psychologists offer trauma-informed perspectives while ensuring mental health support integration. Finally, safety officers verify compliance with district protocols and emergency regulations.
Implementation Timeline:
Begin with a comprehensive needs assessment surveying staff, families, and students about current emergency procedure challenges. Next, create draft designs incorporating feedback and best practices from special education research. Subsequently, pilot test guides with small student groups, observing comprehension and stress responses. After refinements, produce final versions using your poster printer for schools for consistent, professional results.
Training and Practice:
Schedule regular walk-throughs during calm periods, allowing students to familiarize themselves with visual guides without alarm stress. Moreover, incorporate guide review into daily routines, perhaps during morning meetings or transition times. Create social stories featuring the visual guides for students who benefit from narrative preparation. Therefore, when actual drills occur, students already possess strong visual memory of procedures.
Technology Integration: Digital and Physical Solutions
Modern emergency preparedness combines traditional printed guides with digital enhancements. Subsequently, this multi-modal approach ensures accessibility across different situations and student preferences.
QR codes on printed posters can link to video demonstrations for students who process moving images better than static ones. Additionally, audio descriptions support students with visual impairments while reinforcing procedures for auditory learners. Interactive practice apps allow students to rehearse procedures in game-like formats, reducing anxiety through familiarity.
The variety of media types available for poster maker machines enables creation of durable, weather-resistant guides for outdoor assembly points. Moreover, glow-in-the-dark options ensure visibility during power outages, supporting students who may experience heightened anxiety in darkness.