Help guides/Classroom Pro 24 and 36 assembly

Classroom Pro 24 and 36,


Classroom pro assembly

Assembling a Classroom Pro 24 or 36 takes about 45 minutes, two people and the screwdriver in the box. Check the crate contents, unpack the printer, build the stand and follow the setup prompts.

At a glance

Applies toClassroom Pro 24 and Classroom Pro 36
TimeAbout 45 minutes
People2 for some steps
ToolsScrewdriver (included)
Space2 meters (about 6.5 ft) beside the crate for unpacking
You needA letter-size (A4) sheet for printhead alignment; a LAN cable if you connect by network (neither included)

Before You Begin

Important Information

  • Assembly Time: Approximately 45 minutes
  • People Required: 2 people are needed for certain tasks
  • Tools Required: Screwdriver (included in package)
  • Space Needed: 2 meters of space on the side is required for unpacking

Crate Dimensions

  • Classroom Pro 24 (24"): L1154 x W574 x H474 mm
  • Classroom Pro 36 (36"): L1454 x W574 x H474 mm

Package Contents
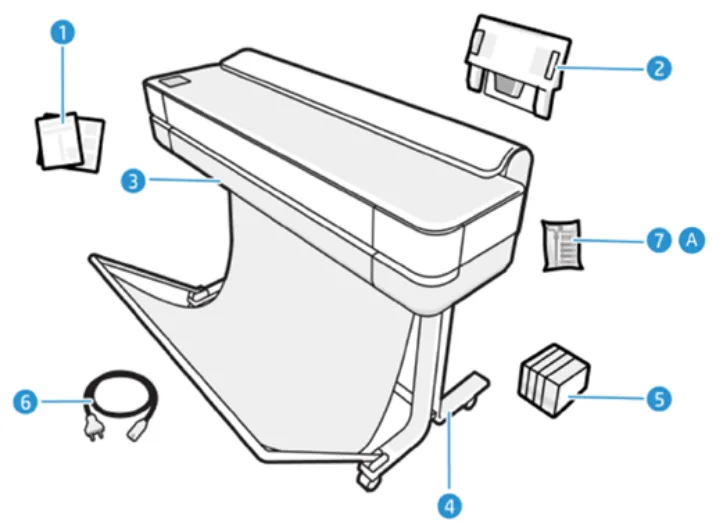
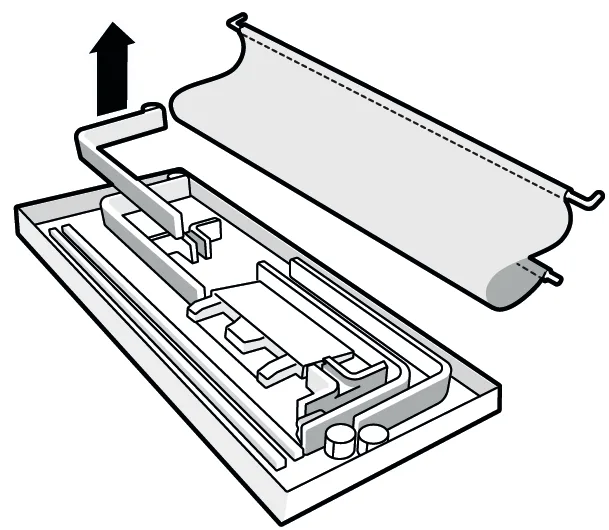
Classroom Pro 24 and 36 assembly: Package Contents, photo 1
The Classroom Pro crate holds the printer, stand pieces, multi-sheet tray, ink, power cord and documentation.

Please verify all components are included before beginning assembly:

  1. Documentation: Assembly Instructions, Introductory information
  2. Multi-sheet tray
  3. Printer
  4. Stand pieces
  5. Ink cartridges
  6. Power cord
  7. Screwdriver & screws (labeled A)
    • Note: Extra screws are provided, some may remain unused after assembly

Important Notes

  • An A4/Letter sheet of paper (not included) is needed for printhead alignment during setup
  • The printhead is already installed - no replacement required
  • For software installation, please contact our support department at 844-473-4700
  • LAN cable not included (needed if LAN connection required)

Assembly Instructions

Part 1: Assembly Preparation
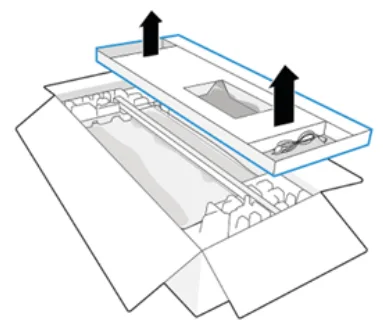
Classroom Pro 24 and 36 assembly: Part 1: Assembly Preparation, photo 2
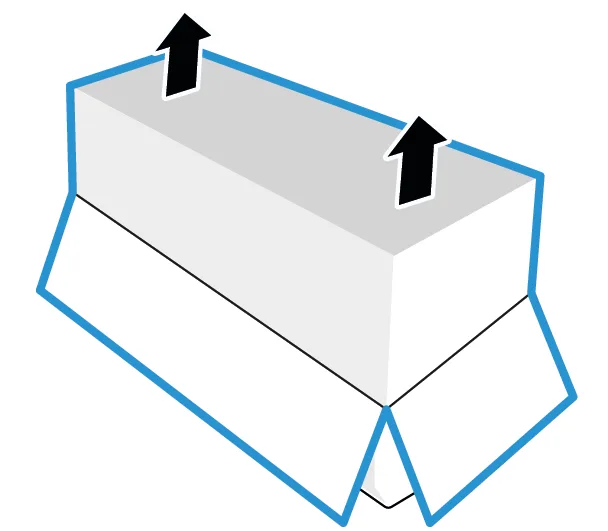
Step 1: lift the accessories box out of the top of the Classroom Pro crate.
Classroom Pro 24 and 36 assembly: Part 1: Assembly Preparation, photo 3
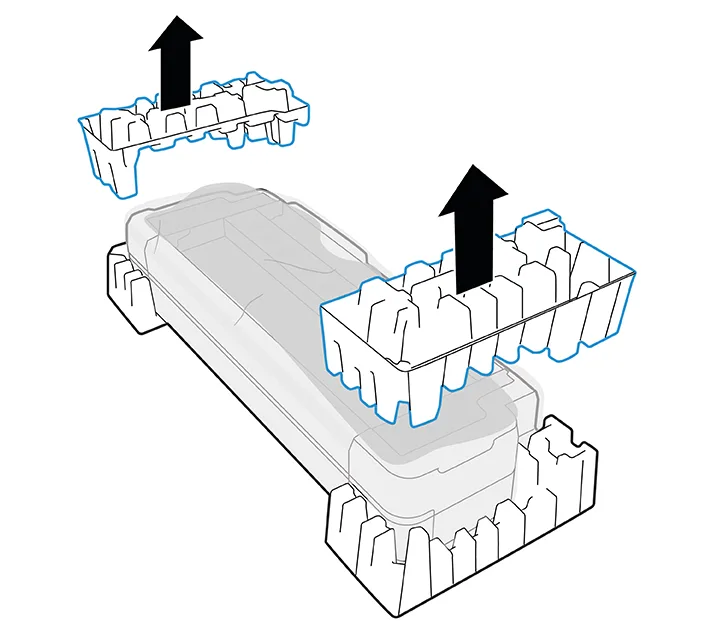
Step 2: take every part out of the accessories box and set the stand pieces and tray aside.
Classroom Pro 24 and 36 assembly: Part 1: Assembly Preparation, photo 4
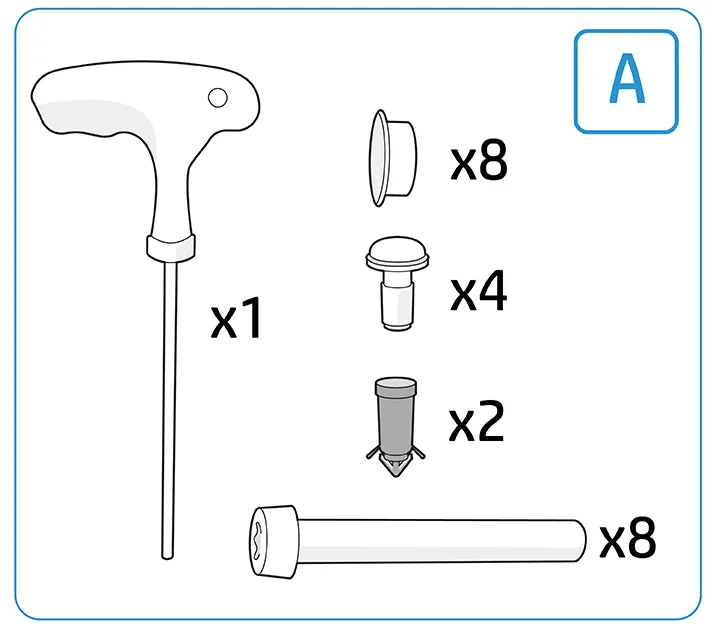
Step 3: hardware bag A holds eight long screws, four medium screws, two short screws and eight caps.

Steps 1-3

  1. Remove the accessories box
  2. Remove all components from the accessories box
  3. Locate the different types of assembly elements
    • Note: All hardware is included in the paper bag labeled (A)
    • You will find: 8 long screws (x8), 4 medium screws (x4), 2 short screws (x2), and 8 screw caps (x8)

Part 2: Unpacking the Printer

Important: Two people are required for this section.
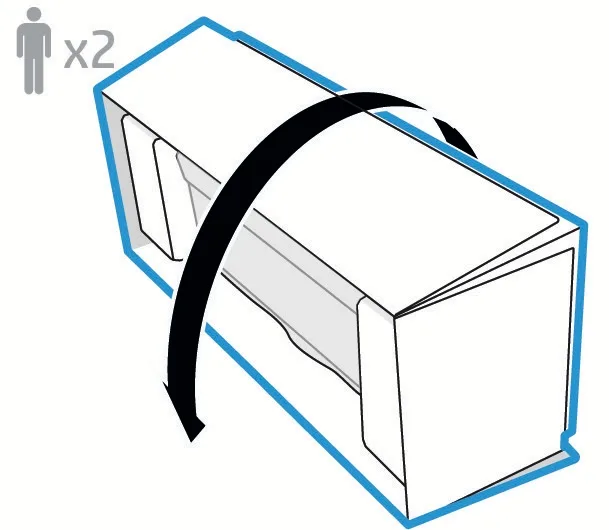
Classroom Pro 24 and 36 assembly: Part 2: Unpacking the Printer, photo 5
With two people, carefully turn the Classroom Pro crate onto its side as shown.
Classroom Pro 24 and 36 assembly: Part 2: Unpacking the Printer, photo 6
Lift the outer box straight up and off the printer.
Classroom Pro 24 and 36 assembly: Part 2: Unpacking the Printer, photo 7
Remove the foam end pieces to free the Classroom Pro poster maker for assembly.

Need help?

Every poster maker package includes remote setup and training on Zoom. If anything in these steps does not match what you see, stop and call us at 844-473-4700, 9 to 5 Eastern, Monday to Friday, or email info@schoolpostermakers.com.

Classroom Pro 24 and 36,


Good questions

Don't see yours? Call 844-473-4700 or read every FAQ.

How long does it take to assemble a Classroom Pro 24 or 36?

About 45 minutes. Two people are needed for some steps, and the screwdriver and screws are in the box.

What is in the Classroom Pro crate?

The printer, stand pieces, a multi-sheet tray, ink cartridges, a power cord, a screwdriver and screws (bag A) and documentation. Extra screws are included, so some may be left over.

Do I need to install the printhead?

No. The printhead is already installed. You only need a letter-size sheet of paper for printhead alignment during setup.

Who do I call for help with setup or software?

Call our support team at 844-473-4700, 9 to 5 Eastern, Monday to Friday, or schedule remote setup on our setup support page.

Trusted by schools in all 50 states,

Let's talk

844-473-4700info@schoolpostermakers.com · Monday to Friday, 9 to 5 EasternGet a written quote